Fashion
How To Make A DIY Cooling Spray For Sunburn
Whether you’re lounging at the beach or having a summer BBQ, chances are you’re probably working on your tan. That, or you're burning like a lobster. Should the latter be the case, you'll need a DIY cooling spray to soothe sunburn and blistered skin. Unfortunately, I fall into that second category, which is why I’ve been on the hunt for a homemade cooling agent that will relieve all my summertime sunburn woes.
Most of us know how uncomfortable burnt skin can be. Not only can it mentally drain us, but it’s usually incredibly painful to boot. Even the smallest of things — like sitting down or stretching — become agony. Although you can buy products that will help numb the pain from most local drugstores, they’re not exactly cheap. Especially considering how easy it is to make a similar formula at home. Take this incredible tutorial by YouTuber Decorate You, for instance. I used their video as inspiration to create a recipe that costs next to nothing.
Featuring key ingredients like aloe vera and coconut oil, the DIY spray will help cool down your arms and legs and make them feel a little less raw. It also ensures that any skin that’s starting to peel or blister will get the moisture it desperately needs. Sounds like a dream, right? Here’s how you can create a batch for yourself.
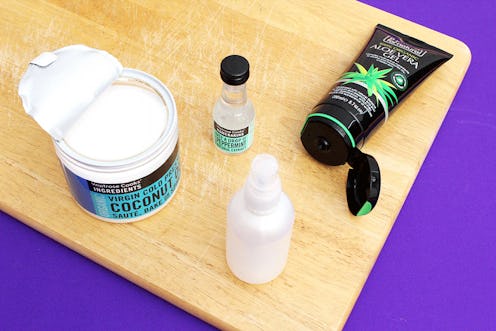
What You’ll Need
To create a DIY cooling spray, you’ll need the following ingredients.
- Aloe Vera (Either A Plant Or Gel)
- Coconut Oil
- Peppermint Oil
- Water
- Empty Spray Bottle
1. Pour Water Into Spray Bottle
Start by pouring warm water into an empty spray bottle so that about a third of it is filled. I know what you’re thinking, “Warm water with these burns? No thanks!” But bear with me. The water will help melt the ingredients. This makes them easier to mix together.
You don’t need to measure the water out precisely. This DIY is very much one of those throw-it-all-together ones, whereby the amount of products you’ll be adding will depend on how much of the solution you want to create.
2. Squeeze In Aloe Vera
Next, add aloe vera. For easiness, I’m using a gel that I bought from a pharmacy. But if you prefer to keep things slightly more organic, opt for an aloe vera leaf and scoop the gel out using a knife and spoon.
The plant is great at soothing and repairing burns, as it contains proteolytic enzymes. These help repair dead skin cells and boost moisture. They can even beneficial to your locks, as they encourage hair growth.
3. Shake The Mixture
Now, screw the top onto the spray bottle and give the mixture a little shake. This will help combine the ingredients.
4. Scoop Coconut Oil Into A Bowl
Another key ingredient we’ll be adding to help hydrate burns is coconut oil. If you’re using one from a tub like me, simply scoop it into a bowl and pop it into the microwave for a few seconds. Wait until it’s completely melted and then remove it.
Coconut oil contains multiple fatty acids including caprylic and lauric. This means it acts as a great anti-inflammatory as well as a good treatment for sun burn. It can even be beneficial to other skin conditions, like eczema.
5. Add Peppermint Oil
The final ingredient left to add is peppermint oil. For this, pour in as much as you'd like. Personally, I love the oil, so I decided to add in a fair amount. This helps with muscle pain relief and is particularly useful if your burn is located on your back.
6. Pour Into Spray Bottle
Now, stir the oils together and pour everything into the spray bottle. Once you've done this, give the mixture another little shake. The oil and other liquid will separate, but try to combine them as best as you can.
7. Store In Fridge And Spray When Necessary
And, there you have it. That’s how you make your very own DIY cooling spray.
Personally, I prefer to store mine in a cold place like an empty cupboard or a fridge. That way, it always feels fresh when I want to apply it on burns or peeling skin.
Alongside being a cheap and effective formula, I think this spray in particular is great for those who are looking for a more practical solution that can be carried with you. By using a travel-sized bottle with a lid, like the one here, it can easily be stored in your purse and you’ll always have it with you if the sun decides to make an appearance.
As for other necessities that will help numb painful sunburn, there's a reason why I've stored the spray so close to those cooling bottles of beer. Bottoms up.
Images: Emma Matthews
SaveSave
