Fashion
I Tried Doing My Makeup With A Dish Sponge

I'm always up for trying new things, but when YouTube beauty and makeup vlogger Maria Yeager used a dish sponge to do her makeup, I was pretty skeptical. I get that beauty sponges are the greatest tool in all of beauty, but is a dish sponge really the same? They're only $3! I decided to do a little investigation to see for myself. Here's what happened when I used a dish sponge to do my makeup.
Beauty sponges have been a part of makeup for years — celebrity and other professional makeup artists are often trained to use sponges instead of brushes for a flawless, airbrushed finish. The cult-favorite sponge is the original Beautyblender — it's a pink, egg-shaped, edgeless makeup sponge you can use to apply anything from moisturizer to eyeshadow, and it retails for $20.
A plain dish sponge, on the other hand, retails for anywhere between $1 and $3 at your local store. While we don't know the exact material of the Beautyblender, we do know its made from non-latex material with an open cell structure — aka, tiny holes that fill up and expand with water, so product sits on top of the sponge instead of absorbing a bunch of fancy, expensive product. Similarly, sponges are made of soft, porous material like cellulose wood fibers or foamed plastic polymers. Can't be that different, right? I watched Yeager do it on Instagram and had to try for myself.
See what happened when I embarked on the challenge.
The Experiment

Like the video suggests, I started with a plain sponge cut in half. I went with the O-Cel-O Handy Sponge pack from Walgreens, which costs less than $3 for 6 sponges. While the video doesn't specify the need to wet your dish sponge, I definitely recommend it. Wetting your sponge ( not matter what kind you're using) allows the material to fill up with water, so product sits on top of the sponge instead of absorbing into it. If you don't wet it, it doesn't work!

O-Cel-O Handy Sponge, $2.49, Walgreens
I first applied a primer and then my foundation with the wet sponge, and all was well. The dish sponge isn't nearly as soft as the Beautyblender or its competitors, but it did the job just fine. I moved onto concealer, cream contour and blush.
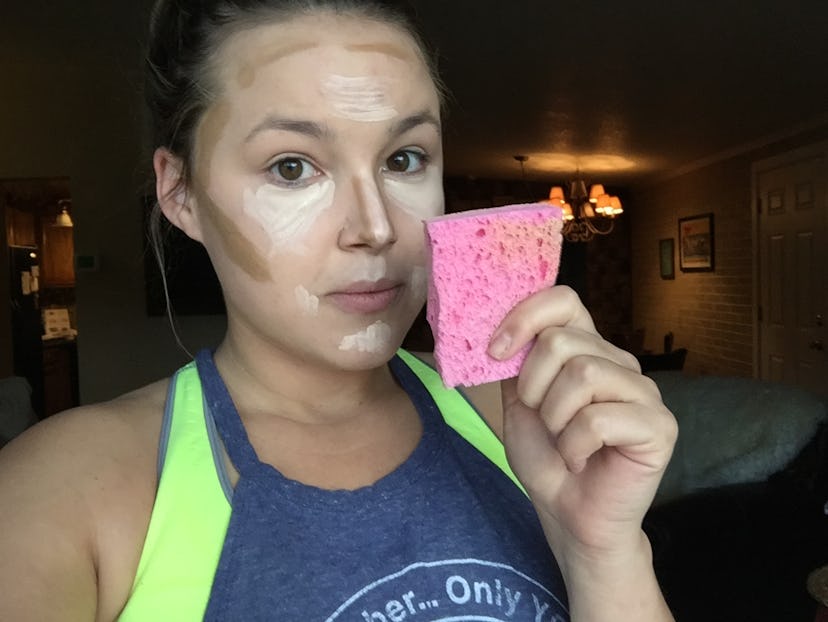
Ideally, a sponge should melt product into your skin. Instead of swirling product around on top of your skin (like with a brush), you can use the rounded sides of a beauty sponge help you roll and press product into the skin. The result is a airbrushed finish. Unfortunately, none of that was happening with this sponge. As I moved on to working with different formulations of product and trying to blend products, the sponge began to fail me. It was taking off my concealer as I went, but refusing to budge my contour lines. Blending with a sponge was a no-go.
The Verdict
O-Cel-O Handy Sponge, $2.49, Walgreens
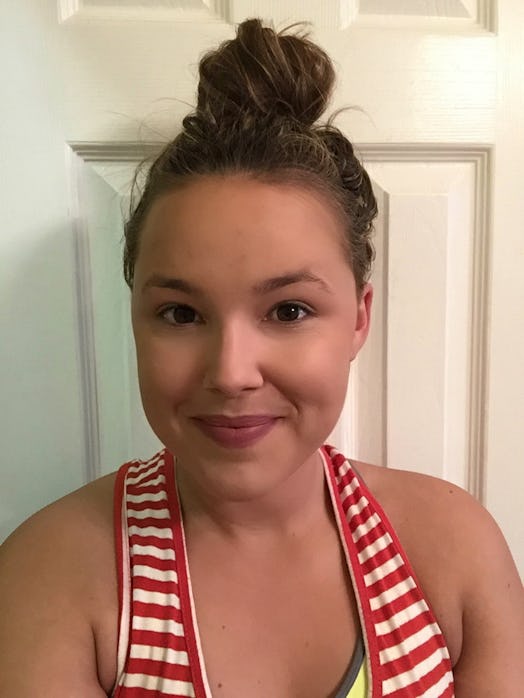
So what's the verdict? If you're stuck without a better option, using a dish sponge as a beauty sponge is totally doable — it's just not the most desirable option compared to a real beauty sponge or makeup brush. My makeup definitely felt heavier than ever, so I won't be reaching for the sponge again — unless it's to do the dishes.
Images: Jessica Willingham
