
I fully attribute the breakouts I experienced in my 20s to my lack of motivation/desire/energy to effectively remove my makeup. Those breakouts would likely be just as prevalent today if I hadn't learned how to make DIY makeup remover pads. I keep a carefully researched natural beauty routine these days, but I'm still guilty of being tempted to pass out with my mascara and foundation still on from time to time. However, I know sleeping in my eye makeup is hell on my pillows and more importantly, hell on my eyelashes and overall eye health. Luckily, these pads make everything easier.
Whether you're wearing natural based products or not, sleeping in makeup can be risky biz. As the Huffington Post reported, sleeping in eye makeup leaves your eyes exposed to the free radicals our eye makeup collects and holds in throughout the day. It's not just your eyes that need protection: Those same free radicals can also lead to wrinkles.. As Bustle's own Lindsay Rose Black points out, pushing makeup into our pores can clog pores which can easily lead to breakouts if you don't wash it off every night. Having my makeup remover on a bunch of pads means I'm just a swipe away from a clean face at bedtime!
If you're ready to go the natural route with your remover, try out this recipe out. It should make enough to last you a solid two weeks of makeup removing bliss.

For this recipe you'll need the following:
- 14 cotton Rounds
- 4 oz tinted, sealable container large enough to store your makeup pads
- 3 oz of rose water and/or aloe vera
- 2 tbsp of organic apricot kernel oil
- 1 teaspoon of arrowroot powder
- frankincense/lavender/clary sage/cypress (optional)
1. Get Your Oil Ready

Once you have all your ingredients, measure out two tablespoons of apricot seed oil and set aside in a glass bowl. There are plenty of other oils like olive oil and coconut oil for removing makeup that will work well, but apricot seed oil is lighter than the above mentioned and therefore less likely to clog pores.
2. Measure Rose Water Or Aloe Vera Gel
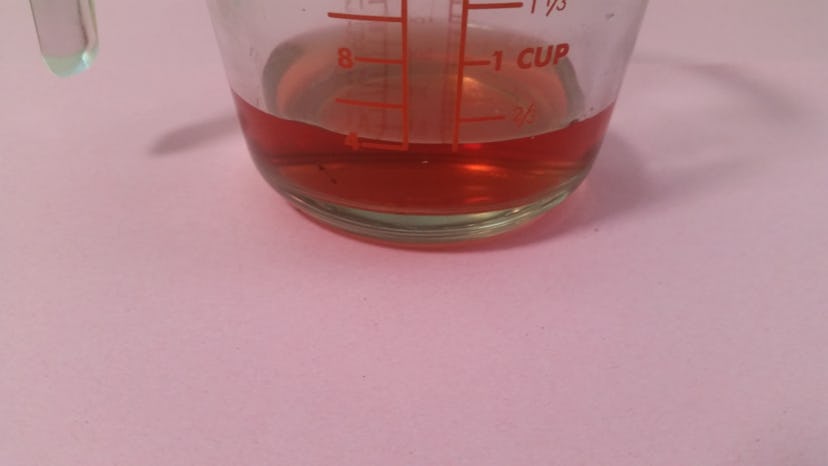
For my recipe, I'll be using rose water in lieu of aloe vera. While aloe vera is another great makeup removing ingredient, I find using rose water has additional beauty benefits and makes natural makeup remover less heavy. If you're using aloe vera, you'll want to work with its liquefied form.
3. Mix Your Oil & Water
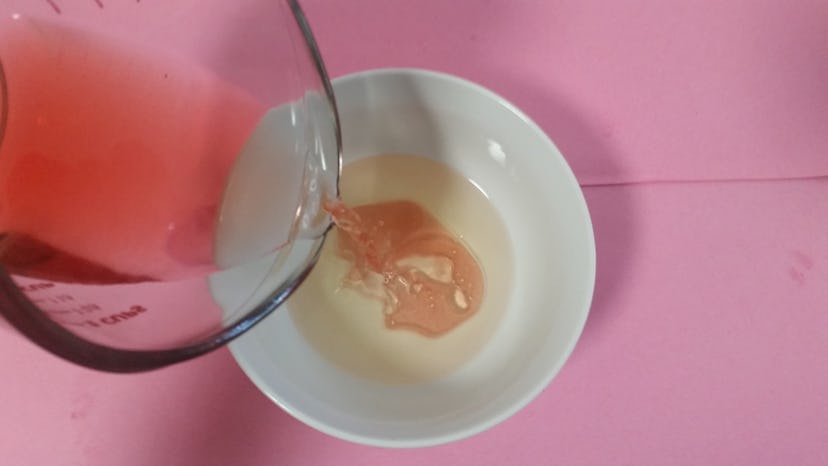
Mix the rose water (or aloe vera) and apricot seed oil together in one bowl. You'll notice that the oil and water will naturally separate, which is another great reason for making swabs as opposed to just making a remover by itself.
4. Add Your Arrowroot
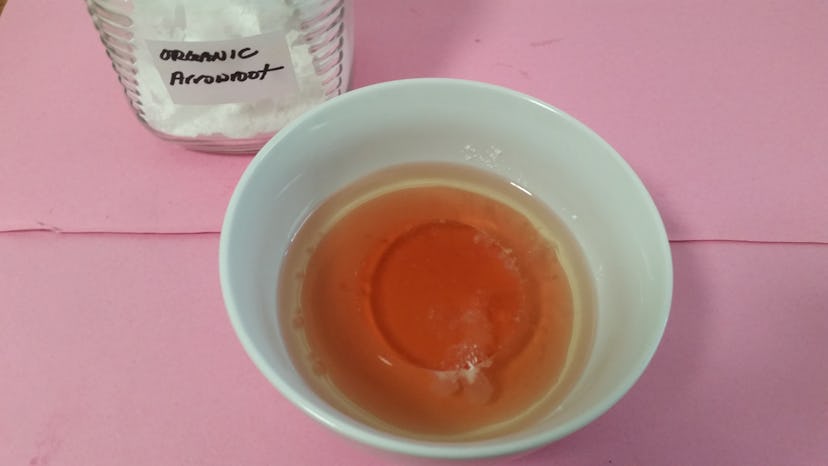
Arrowroot powder works as an emulsifier, so your remover will blend together nicely. Add a teaspoon of the powder to the bowl of water and oil and mix vigorously. I used a blender to mix my ingredients together for about 30 seconds, but you can mix by hand as well.

If you chose solidified coconut oil instead of apricot seed oil, you can ditch the arrowroot and blend your oil and water together in a blender.
5. Add Essential Oils

Remove your ingredients from the blender and place in a glass bowl. This is the time to add any essential oils or aroma to your makeup remover. One of the reasons I'm adding EO's to my blend is to keep my makeup remover lasting longer; these volatile oils can act as natural preservatives.
Of course, since I'll be using my makeup remover near my eyes, I'm avoiding many irritating oils. For this mix, I chose three drops of clary sage, since it's known holistically to improve eye health, and 3 drops of cypress essential oil for its astringent properties on my face. Note: Theoretically, you can mix and match your favorite EOs, but if you are not familiar with essential oil safety, I'd recommend you stick with these essential oils.
6. Get Your Container Ready For Makeup Removing
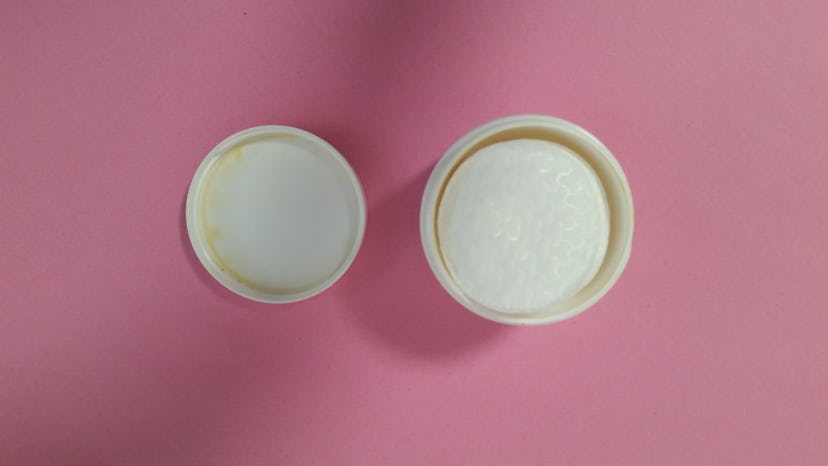
Place your cotton pads in the sealable container. My 4 oz jar I was able to fit 20 cotton pads comfortably.
7. Build Your Makeup Remover

Use a funnel or a measuring cup with a pour to carefully pour your makeup removing blend directly into the jar filled with cotton pads. The cotton pads will begin to drink up the liquid and you can continue to pour. Store your container in the fridge to keep prolong the expiration date.
8. Use Your Makeup Remover

Once you're ready to remove your makeup, grab one of the cotton pads and wipe it evenly over the areas that need attention. Give your face a nice rinse before proceeding to your evening cleansing/moisturizing routine.
Image: Kristin Collins Jackson (9)
