Life
DIY Hanukkah Decorations Don't Get Much Easier (Or Cuter) Than These No-Sew Tassel Ornaments — Make Them in 7 Simple Steps
Embroidery floss isn’t just for friendship bracelets! We mined our personal floss collection for all shades of blue, and created ornaments to decorate this year’s Hanukkah branch. Here, we show you how to make your own super-easy — and very classy — tassel ornaments (just in time to wow tonight’s guests!) with this versatile string. Tassels are pretty expensive, and it's hard to actually find ones that are cute but still understated (i.e. ones that come in a variety of colors but don’t look like they belong on curtains). Check out our simple no-sew tutorial.
Images: Allegra Muzzillo
They're Easy!
DIY Hanukkah tassels are an incredibly easy no-sew project — one that doesn’t require sewing skillz, a needle, or a machine. Plus, you can make them different lengths and thicknesses for a fraction of what you’d pay for passementerie. All you need is floss for the tassels, a pair of scissors to cut the string, and the Hanukkah branch on which they’ll dangle.
We chose embroidery floss (in a mélange of blues to commemorate the Festival of Lights) because it’s inexpensive, and it’s really the easiest material to find. You, however, can use any type of string or twine (cotton, silk, variegated, metallic) that’s thin enough to work with for this project. Here we go!

It All Started with One Paper Bag...
OK. So, many people say you need cardboard for this project. Bah! Not us. We scrounged around and found a nice medium-sized paper bag — and found it was substantial enough.
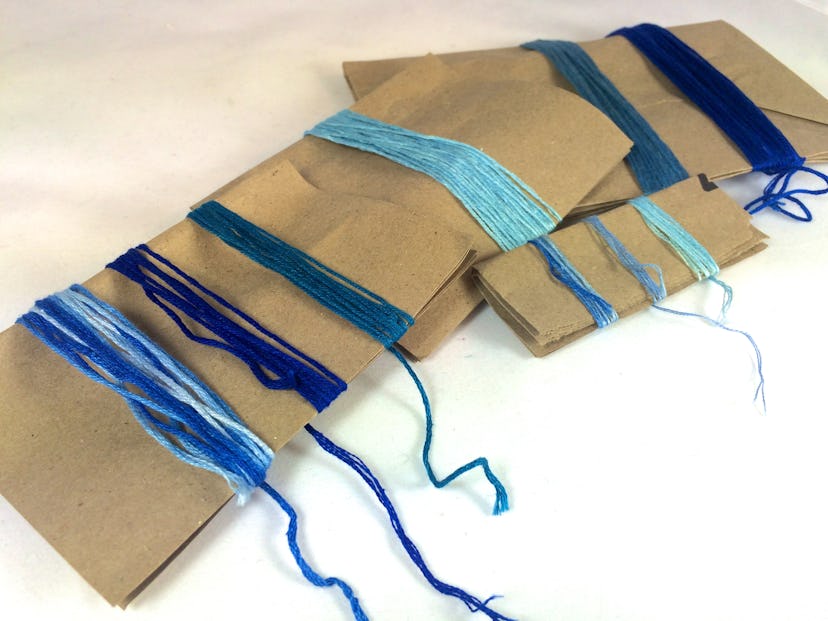
If you have cardboard on hand, great! But if not, cardstock, a manila envelope, or flyers and brochures (aka junk mail) work well, too. Cut paper into varying widths, and fold each piece in half. We created four widths — large to small.

Step One: Start Wrapping.
The thickness of each tassel depends on the number of times the floss makes a complete wrap around the paper.
Allow the first piece of floss to fall a few centimeters past the open end of the folded paper. Hold this piece in place with your thumb while the other hand wraps the rest of the string. Don’t worry about where the end falls, you can trim excess or leave it there. Up to you. Note: Don’t wrap too tightly, or you’ll have trouble sliding the string off the paper/cardboard/whathaveyou.
Step Two: Thread the Needle.
Joke! This is truly a no-sew project! (Did you think we’d pull a fast one?) But seriously, folks: Thread a piece of string through the top of your would-be tassel. This will be what the tassel will dangle from. We chose white twine, to contrast every shade of blue we used.

Step Three: Remove String from Paper.
Keep a firm grip on the piece of string you threaded through the top of your tassel, and slide everything off the paper. The result? A bundle of string that looks kind of like something we stomped on in our first NYC apartment. But we digress…

Step Four: Create the Hanger.
Next, tie another piece around the top portion of the tassel — tightly. This will create the much-admired, slightly bulbous shape typical of a pro-grade tassel. Tie three times, four, five, or only one time. Go nuts.

Step Five: Trim Ends.
Cut through each loop that forms the bottom of each tassel. Try to do this evenly, but you can correct unevenness. Just know that each time you do, your tassel will inevitably experience some shrinkage.

Step Six: Tidy Up.
Leave the ends of your hangers to hang alongside the main tassel, or trim to create a festive bow-like effect.

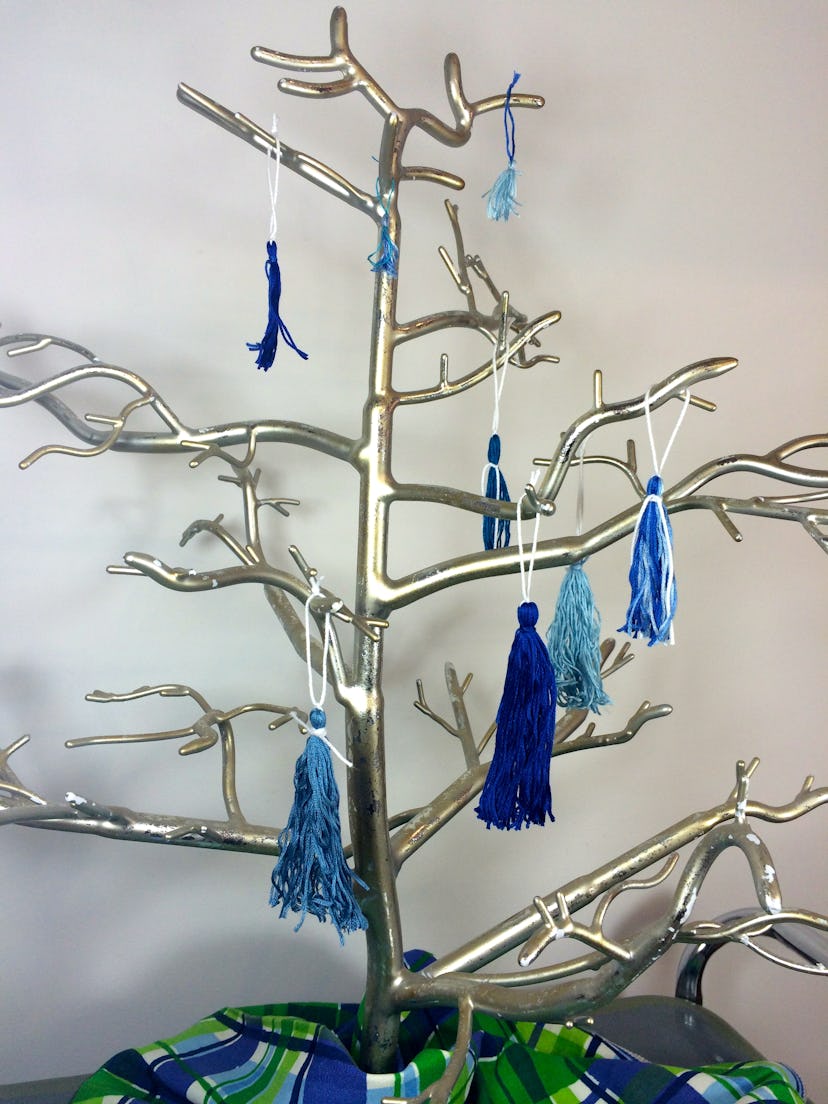
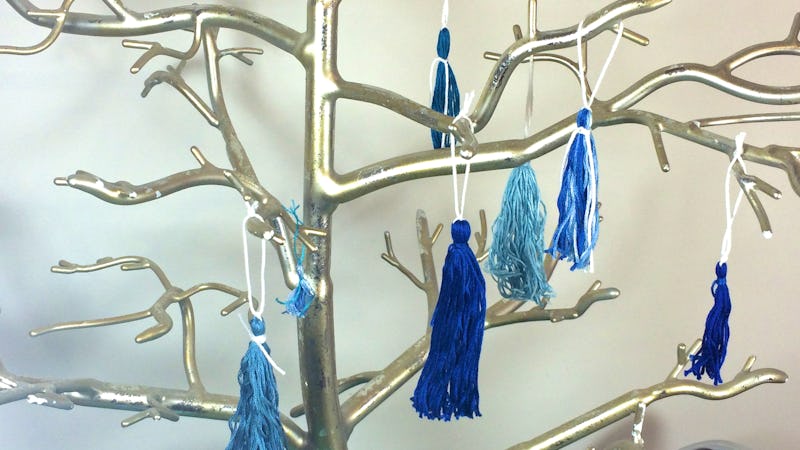
Step Seven: Decorate!
Hang tassels to your heart’s delight. Ours range from uber-tiny (seen here) to large and skinny. Make yours uniform or experiment, like we did.

If You’re a Perfectionist...
Carefully steam tassels so they fall in a straight line. We’re a little scraggly by nature, so we left ours as is.
You like? Let us know!