Life
DIY Confetti For New Year's Using Tissue Paper, Paint, And a Carton of Eggs (Seriously)
Hooray for 2015! If you're anything like us, you've been waiting to sweep 2014 under the rug for a while now. Presenting: The best little craft project for you and a couple of girlfriends to get lost in while preparing for the onslaught of incoming guests. In about an hour's time, you'll have a dozen DIY confetti egg bombs, and evidence of your craftiness will surely blow everybody's mind. (Har har.)
Sure, confetti is a bit messy — but, as we basically just said... so was the whole of 2014. So crack and smash these little gems with abandon, and have the happiest of New Year's Eve celebrations. Here's to a happy, healthy 2015!
Images: Allegra Muzzillo
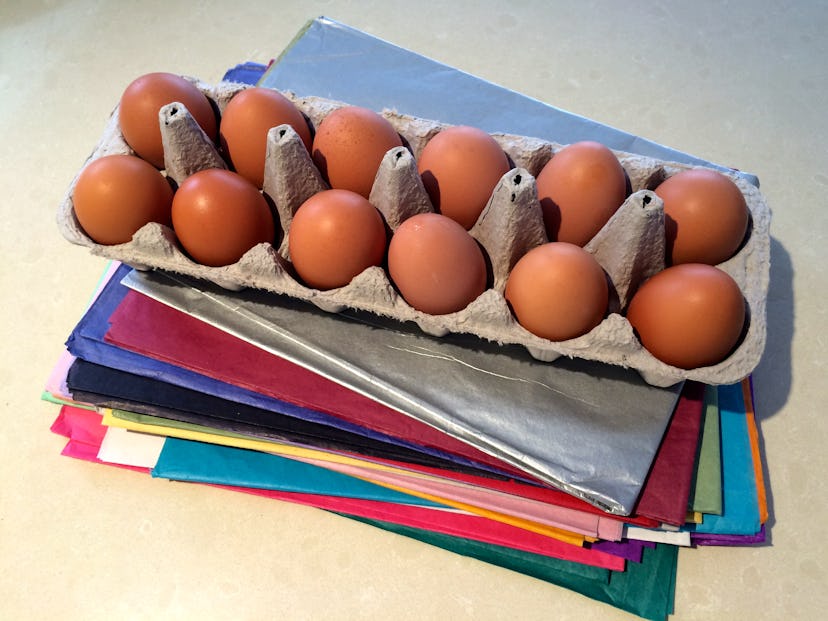
Step 1: Gather Supplies
Basically all you need is a dozen or so eggs, tissue paper, scissors, glue, and craft paint (optional).
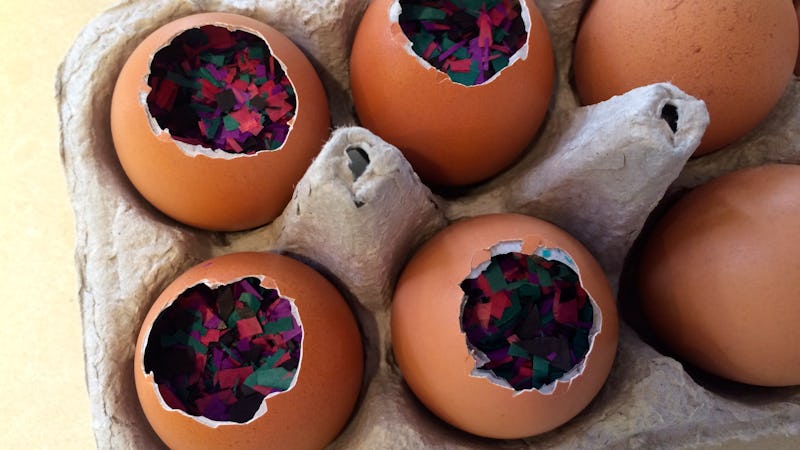
Step 2: Crack Some Eggs
Well, not really. Just poke big holes into them. We used the tips of a pair of scissors to gently peck, peck, peck away until just a bit of an eggshell gave. Then we — gingerly — pecked more and more away until we had just enough of an opening via which to fill the inside with confetti.
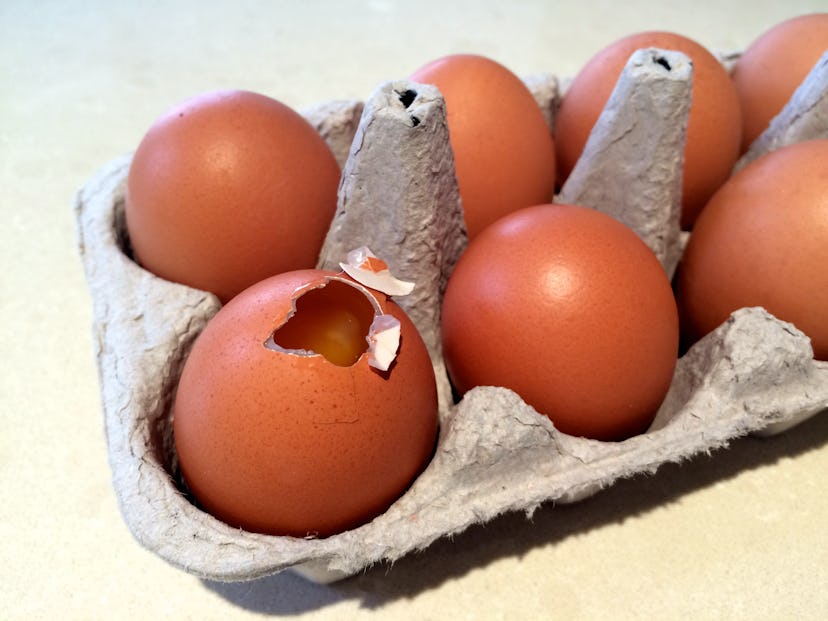
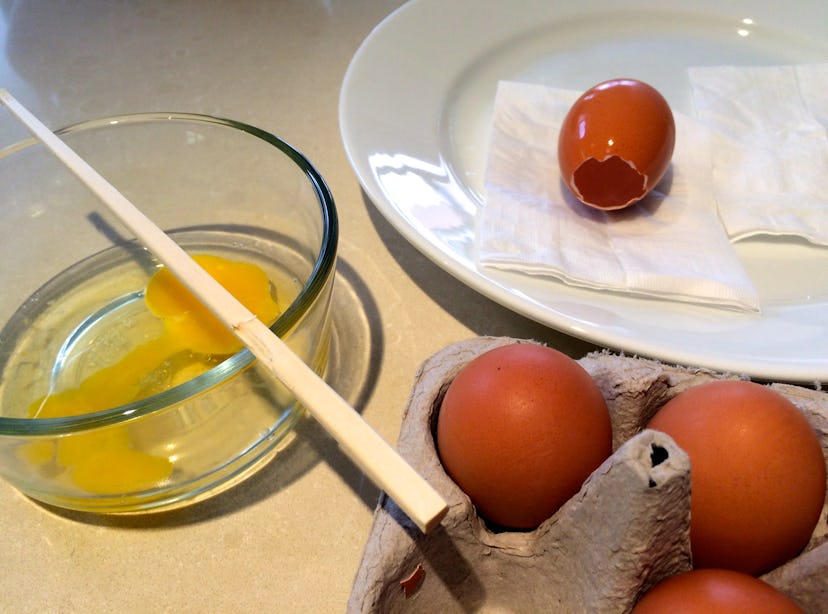
Step 3: Dump and Rinse
Dump egg whites and yolks into a bowl, then refrigerate and save for morning-after omelets. Fully rinse eggs, inside and out, and air dry. Want to speed up the process? Use a hairdryer on its least powerful setting, and hover about 1.5 feet over each egg.
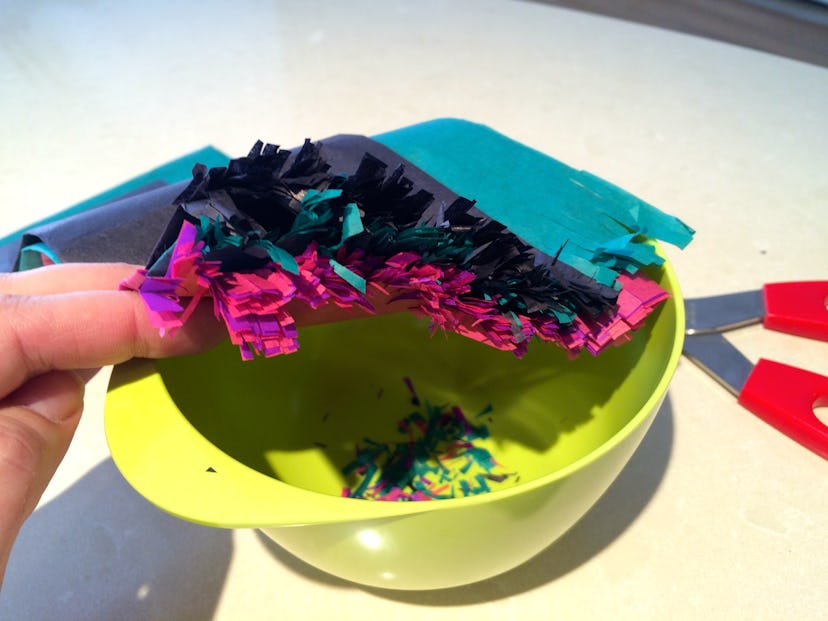
Step 4: Make Confetti
This part is fun and easy. Gather and fold up a few pieces of tissue paper together. (The more colors, the better.) Snip edges lengthwise to create a 2- to 3-inch fringe. Then, cut the fringe crosswise to create a ton of multicolored confetti squares.
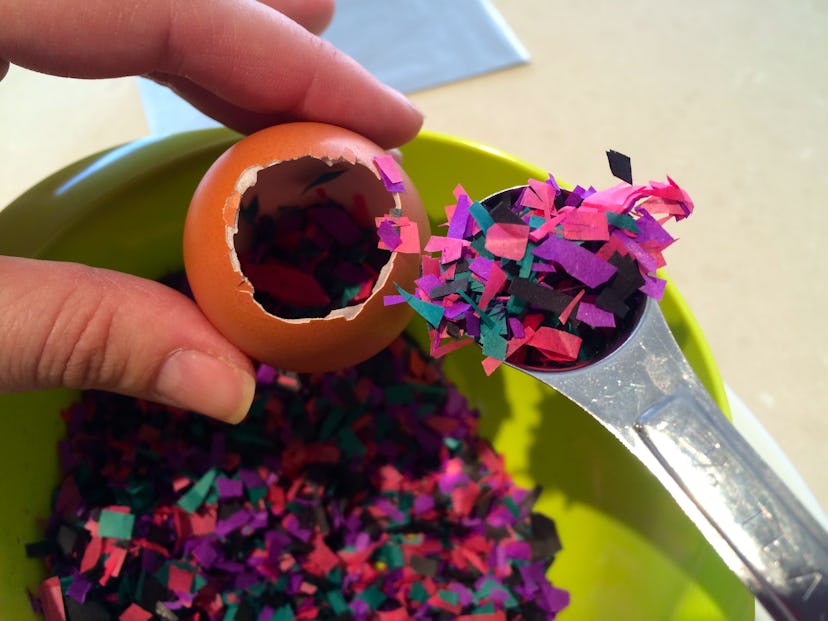
Step 5: Fill Eggs
A half-teaspoon from our set of measuring spoons was the perfect size to deposit confetti in no time at all. Eggs should be about two-thirds full. Use more or less — it’s totally up to you.
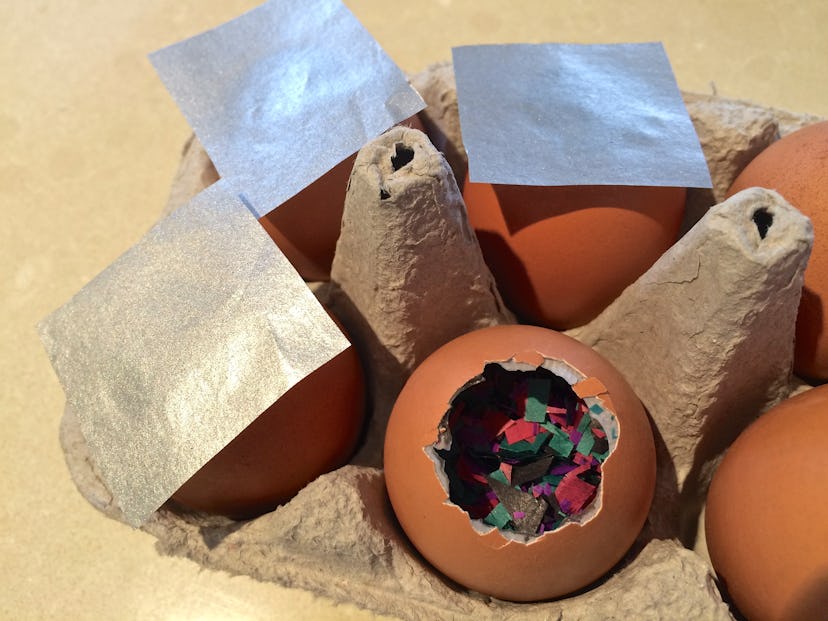
Step 6: Seal Eggs
Cut tissue paper into small squares that will slightly overlap the holes in each of your eggs. We chose silver paper because we planned to paint each egg a shimmery (and very festive, if we don’t say so ourselves) silver metallic — but any color will do.
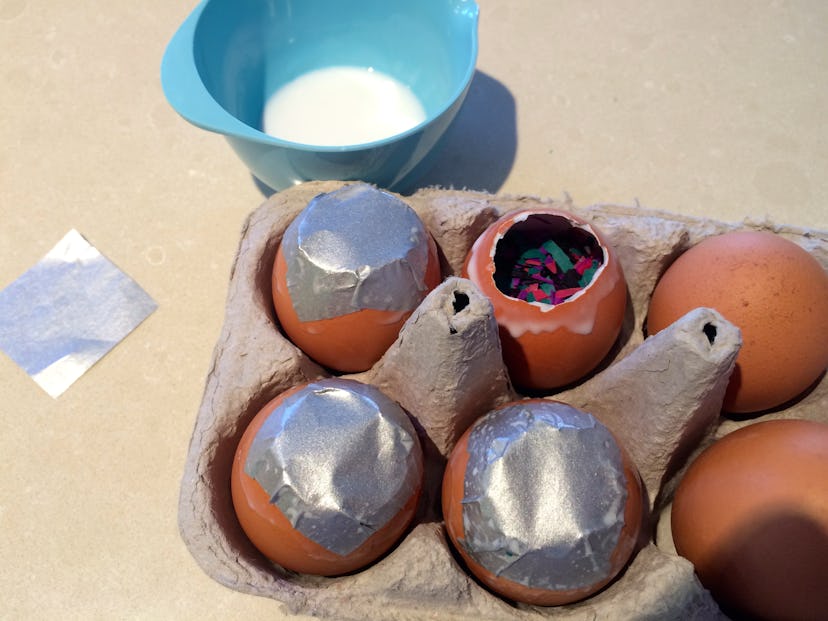
Step 7: Glue in Place
Craft glue tends to be sticky and doesn’t dry that fast. We chose to water down our glue and essentially decoupage (i.e. paint) the seals onto the eggshells. This created a more even surface, and much less of a mess. Create a mixture of one part water to three parts glue — or a ratio that’s similar. (Basically enough water so that the glue is easily mixed, and creates a watery paste.) This is, incidentally, why you should retain the original egg crate.
Let the sealed eggs air dry, or try the hair dryer trick again, for faster drying time.
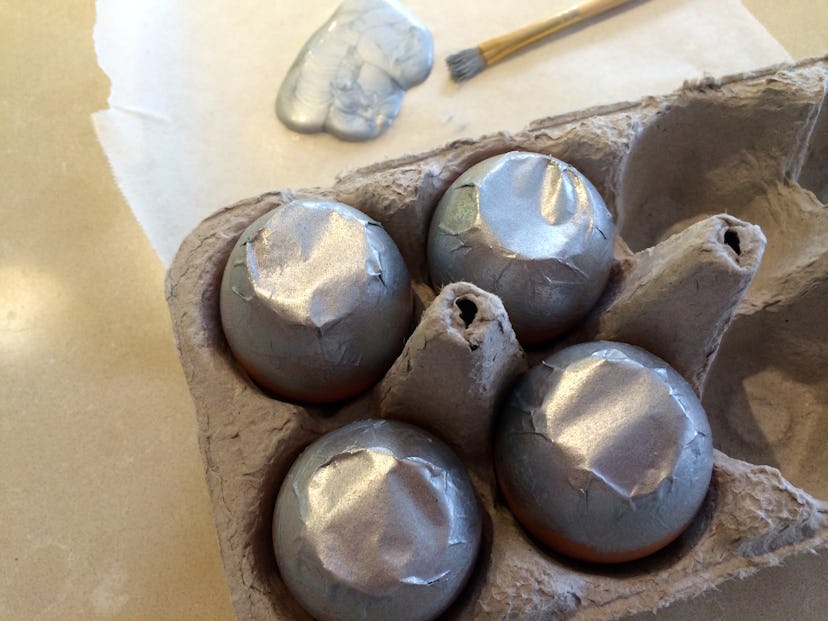
Step 8: Paint Eggs, or Leave As Is
We always thought silver was NYE’s unofficial (or official?) color. Paint your eggs, or leave them as is.
Step 9: Enjoy!
These eggs are possibly the cutest way to ring in the new year, no?
Happy 2015, everybody!

