Fashion
How To DIY Your Own Distressed Jeans

I think distressed denim has that effortless, cool, downtown look that not only pays tribute to the grunge era of the '90s, but also is modernized on some of the hippest street style stars today. Since it's oh-so-trendy, the ripped to shreds look can be worth quite a pretty penny. No one really wants to hand over a wad of cash for jeans with holes in them, which is why it's so much easier and cost-effective to DIY distressed denim in the comfort of your own home.
I know that most DIY projects are easier Pinned than done, but making distressed denim is actually simple. In fact, it's even easier than sewing in a button that fell of your blouse, or even turning on Netflix. OK, maybe it is a little more work than turning on Netflix, but it's way worth it. You have the only need three things to distress denim, on top of an old pair of jeans.
So, instead of having to go shopping and spending bank on a pair of what your mom would call "trash that needs to go in the garbage" (or is that only my mom?), here are seven easy steps to creating your perfect pair of distressed jeans, exactly the way you want them. Because literally everyone looks cool and chic in ripped up denim.
Tools
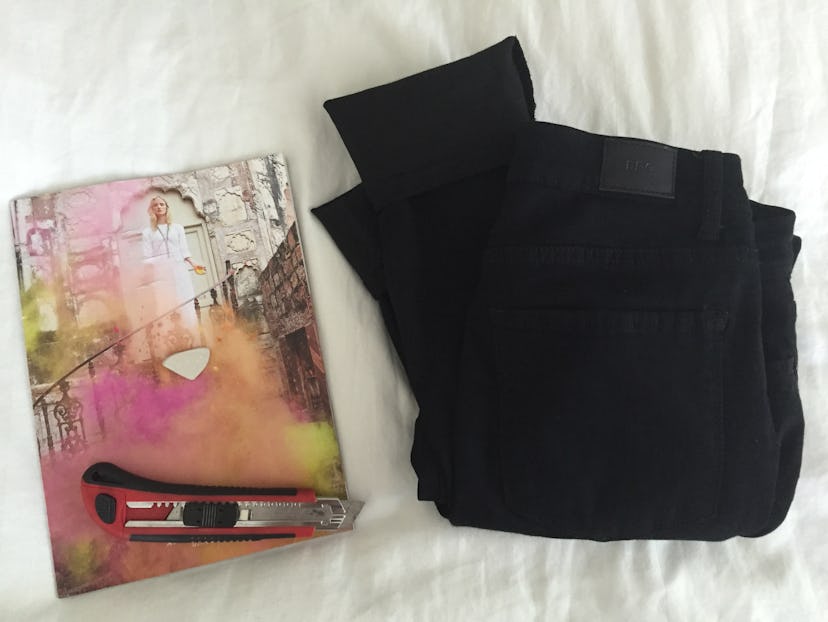
Like I said before, you only really need three tools to distress your denim. Typically, all of these things can be found lying around your own home, or you cam borrow them from a friend or neighbor. The key tool you need is an X-Acto knife, or any kind of safe sharp blade, to rip into the fibers or your denim with. The more precision this tool has, the better your rips will turn out. So try and find something that's sharp, safe, and easy to handle. As you can see, something like my knife with a plastic cover worked for me, but whatever you can find that's similar will work.
Besides that, the tools are interchangeable to what you have readily available. You will need either an old magazine, cardboard, or catalog (what I used), and a piece of chalk or a colored pencil. And, lastly, that old pair of jeans that desperately needs some love. And now we're ready to distress.
Step 1
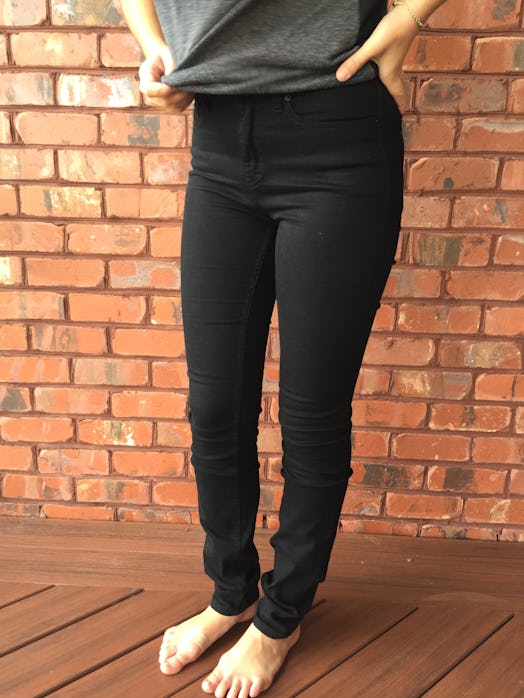
Wipe the dust off those jeans you haven't worn in forever, and see how they fit. As you can see, my pair is boot leg and quite fitted around the waist, but with a lot of fabric near the ankles. While most distressed denim comes in a skinny, fitted design, you can also do this to whatever pair of jeans you think would be best. Straight leg, high-waisted, low-waisted, whatever you want your pair of jeans to be, throw them on.
Then, grab that piece of chalk and mark where you think you would like your holes and rips to be. I modeled my pair after an Instagram photo of Cara Delevingne, where her rips were mainly on her thighs and around her knees. Plus, I hated that extra baggy fabric around my ankles, so I decided I would cut those off first.
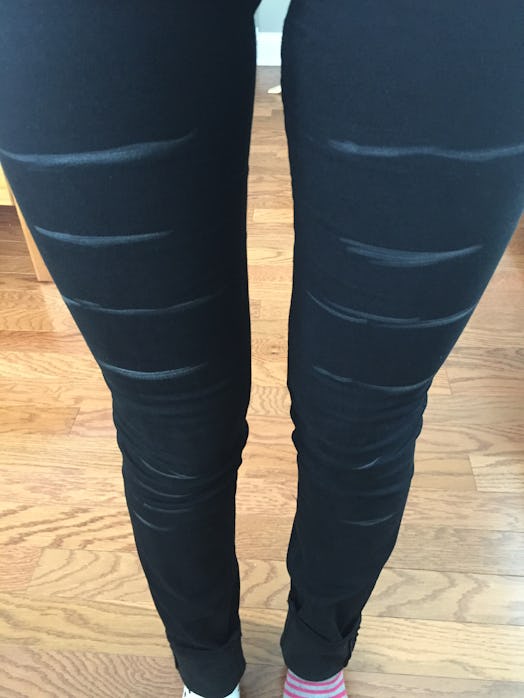
Once you're done marking your jeans, they should look a little something like this.
Step 2
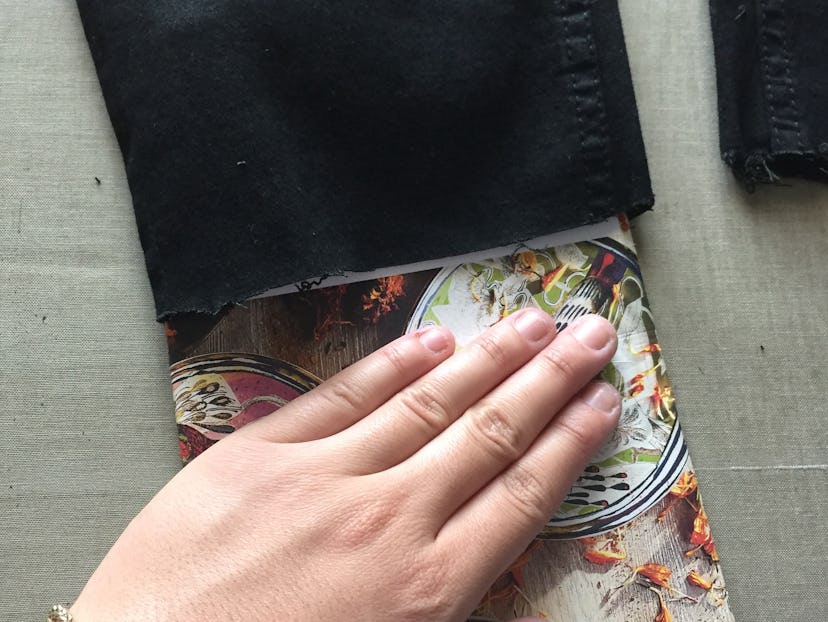
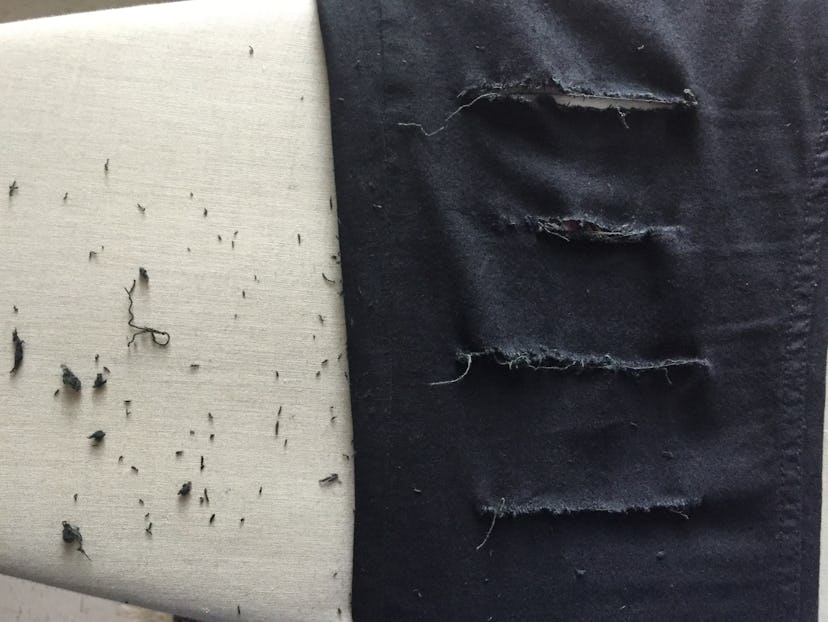
Lay your jeans on a flat table, grab the catalog, magazine, or cardboard and fold it in the shape of one of the legs of the pants. Just like I'm doing in the photo, this piece of paper will prevent you from cutting through to the other side of the leg. While distressed jeans are cool, distressing the back of your jeans might not have the same look.
Next, you'll grab your knife and start horizontally scratching at the fabric where you marked your jeans. This definitely takes some elbow grease and patience, but eventually you'll cut through the fabric and see the cardboard underneath it. At that point, you can continue to use the knife, or rip the fabric where the hole is. Because the fibers run horizontally, the fabric will make a clean rip if you pull on the edges of the hole you already made. Just be careful not to cut your fingers with the knife, or pull the edges too far. It's safe to keep to your marked lines, and then adjust later.
Once you have gotten through at least one or two holes, your jeans should look a little like this. And yes, there is a little bit of a mess where the fabric rips, but trust me, it's worth it.
Step 3
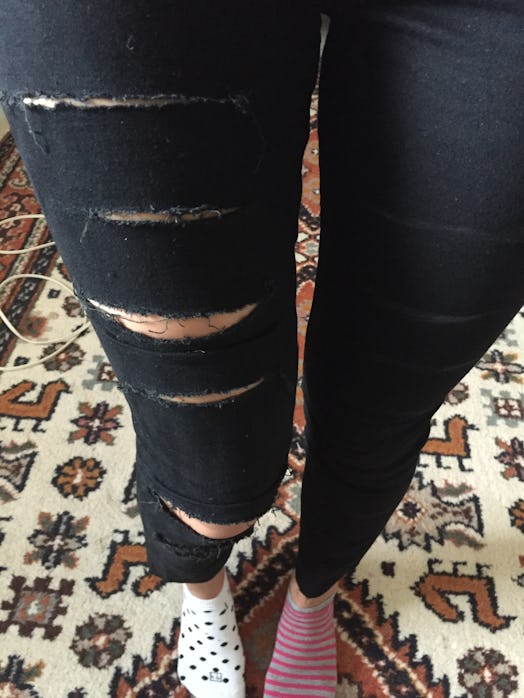
After you have finished making holes on one leg only, try the jeans on to make sure you like the results. I loved the way my jeans were already fraying at the holes, which you can do by pulling at the fabric where the holes are made (you can also use a tweezer to do this, or throw your jeans in the wash). If you like the way it looks, continue doing the same thing on the other leg. Just don't forget to take them off first!
Step 4
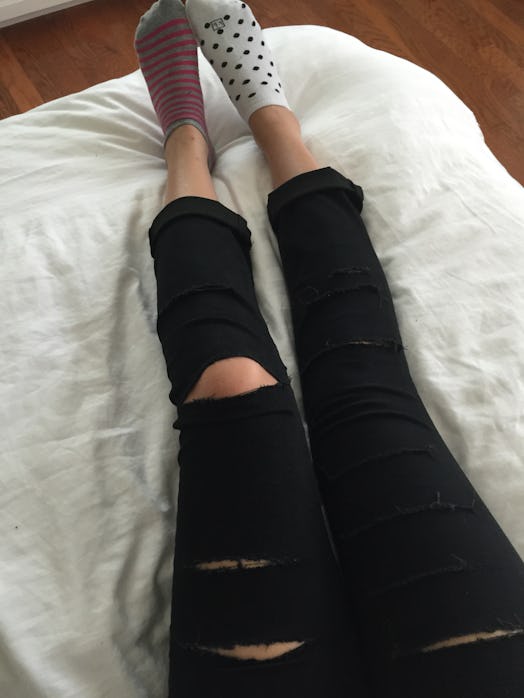
Next, once you have both legs ripped and distressed, try the jeans on for final adjustments. Maybe you think one hole should be bigger, maybe one should be more frayed. Go ahead and make these changes at this time. It's better to start small, because you can't easily sew the fibers back together. And while you might think to cut out a part of the jeans, don't. Distressed jeans look best when they're just slashed horizontally, and the fabric pulls apart naturally to create that tattered look.
Step 5
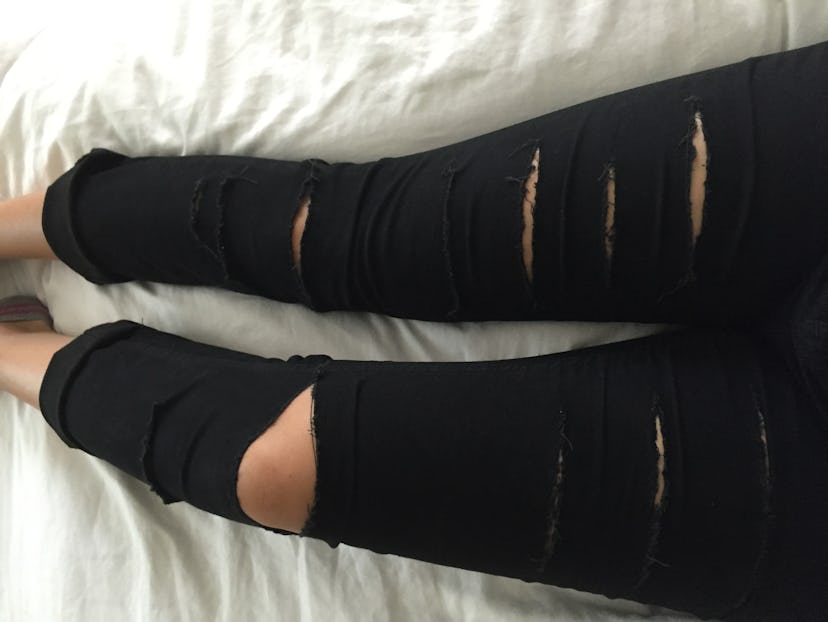
Lastly, take those babies out for a spin! You're wearing some of the coolest, trendiest denim of the season, and they only took about 15 minutes to make. Depending on what you wanted them to look like, you may have gone for lot's of holes like me, or maybe just one or two. Either way, it's was easy and quick, and perfectly cool especially for the end of summer and the beginning of fall.
Images: Melodi Erdogan, Instagram, Giphy
