Style
3 Eyeshadow Alternatives For Eyeshadow Haters

So much of the beauty world revolves around the eyes. New palettes need new tutorials, new tutorials lead to new looks — and what's a look if you don't put it up on Instagram? It's all very exciting — unless you're a person who hates eyeshadow. What then? Where's a hater to turn?
Personally, I've spent a lot of time avoiding shadows completely, telling myself to go for big lashes and a statement lip instead. But even though I don't need eyeshadow, (let's face it no one needs any of this), I couldn't resist their siren call. When I started dipping a toe into the world of eye colors, I realized that there are some alternative products that effectively replace traditional pan eyeshadow, all of which are easier to use and more forgiving. And now, I bring my secrets to you.
The truth is, there are many different types of products you can use that are not traditional pressed powder shadows, including creams, pencils, sticks, pigments, and glosses. Below, I'll show you how to use my favorites and pull off some pretty impressive looks that appear to take a lot of skill — but they're actually super easy. Eyeshadow haters, link up.
1. Cream

Ciate London Cooling Shadow Stick, $16, Sephora
There are a ton of options for cream shadows out there, from drugstore to high end. The ones I'm using are from the Cooling Eyeshadow Slicks from Ciaté, for no other reason than I just got my hands on them and the colors are not what I'd usually use. In beauty, and in life, I hate shimmer and I hate blue, so naturally, I am giving you a shimmery blue eye. They definitely pack more drama, and I love drama.
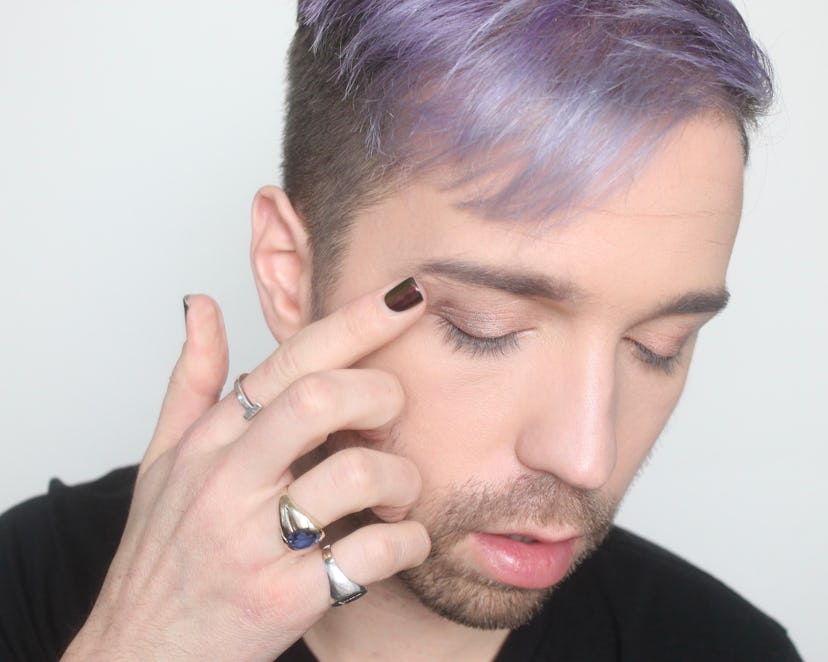
I started with the lightest color on the center of the lid and then worked back to the darkest in the crease. I took Frozen, a pewter chrome (it's silver, Tynan) and applied it to the back of my hand so I could have total control when applying. Then, using my ring finger, I tapped it all over the lid.


These apply nicely and give you enough play time to move them around and blend them out before they dry down.
To make sure the pigment was really reflective, I let the first layer dry down and applied a second one right on top of it. The second layer really set it off. Plus, they layer nicely, without getting stick or gummy, and without any creasing.

Then, I took my transition shade, Ice Box, a turquoise-green, and tapped it onto my outer corner and against my lash line, going only about a third of the way in.

If you apply too much color, you can always go back and fix it later. Rest assured that creams are really hard to eff up.
Now, applying your makeup with fingers is great because most of us have a full set and it's really hard to lose track of them. The only downside is that sometimes, they can make blending a little patchy. If you can, grab a brush to buff out the edges.

I know what you're thinking, eyeshadow haters, but brushes are not the enemy: Eyeshadow is. Brushes can help your cream products look even better, with little effort.

Finally, I grabbed the darkest shade, Ski Bunny, a surprisingly dark sapphire, and pressed it right into my crease. Since the color is so dark, I didn't want to overdo it (me? never) too soon, so I used just a bit on my pinky and built from there.

Then I grabbed a brush to diffuse the dark blue again.

From here, I made sure both sides were even and then tapped a bit more of the silver right in the center of the lid to give it a little extra pop. Finally, i added some mascara and a lip and the whole thing came together.

That was easy, wasn't it? And all I used were my dumb fingers and one measly brush. The lip is Ciate's Liquid Velvet in Envy, and you have to admit that I'm telling a strong color story with this one.
2. Pencils

'Me & My Shadow' Waterproof Eyeshadow & Eyeliner, $20, Nordstrom; butter LONDON Smoke Stick Quick Smoky Eye Shadow Duo, $20, Amazon
Pencils are great for travel, as they're way easier to cart around with you than a big palette would be. Plus, when it comes to application, they allow you to get the color right where you want it from the lash line to the crease.
I wanted to do a soft, shimmery pink lid smoked out into a fawn brown. To start, I took highlight shade from the Butter London Smoke Stick and drew it all over my lid.

It's a nice champagne with just a touch of pink that is beautiful even worn alone.

Then, I grabbed the Me & My Shadow Eyeshadow Stick from Eyeko in Taupe and traced the outer corner of my eye from lid to a third of the way into the lash line.

Then, I blend with my fingers or a dense brush. These pencils are nicely blendable, but have a little less give than a cream pigment, so tightly packed bristles will give you the best blend.
Finally, I grabbed the same shadow stick in Chocolate, a deep matte brown, to carve out the crease and blend everything together.

So now you have a soft, sorta shimmery, beautiful eye. I'm actually obsessed with this if I do say so myself.

YAS. But, you really want to take it there? Okay fine. Grab Maybelline's Color Tattoo Eye Chrome in Gilded Rose.

Maybelline Color Tattoo Eye Chrome Shadow In Gilded Rose, $6, Amazon
Oh yes girl, we're about to.
I tapped a bit of it on the back of my hand, and took my index finger and dipped it in and placed it right in the center of my lid. You just need a little, but again, it's pretty easy to work with, so just take a breath and take your time. I blended out the edges with a small tapered brush.

I love this look with and without that final step, but I love that little bit of pink platinum on the lids.
Anyway, throw on some mascara and let them have it.
3. Liner

Too Faced Sketch Markers, $20, Sephora; Maybelline Lasting Drama Waterproof Gel Pencils, $6, Amazon
Let us never forget the virtues of a good graphic liner. I have hooded lids that don't give me a lot of room to play, which is another reason why traditional shadows aren't my thing. I love the looks above because they're quick and easy, but an even bigger cheat is just to get yourself a pigmented liquid liner and use only that.
There are a ton which would work great, but the Too Faced Sketch Markers give you a thin felt tip for precision and lay down a bright trail of liner. If you can pair it with a matching pencil to finish the look, it's even better. I used the Maybelline Lasting Drama Waterproof Gel Pencils, which, you guys, are so good. They're insanely smooth for tightlining and the color payoff is on ten.
Remember that blue liner moment that Queen Willow Smith gave us at Chanel? I always think of that when I try to yank one of these looks.
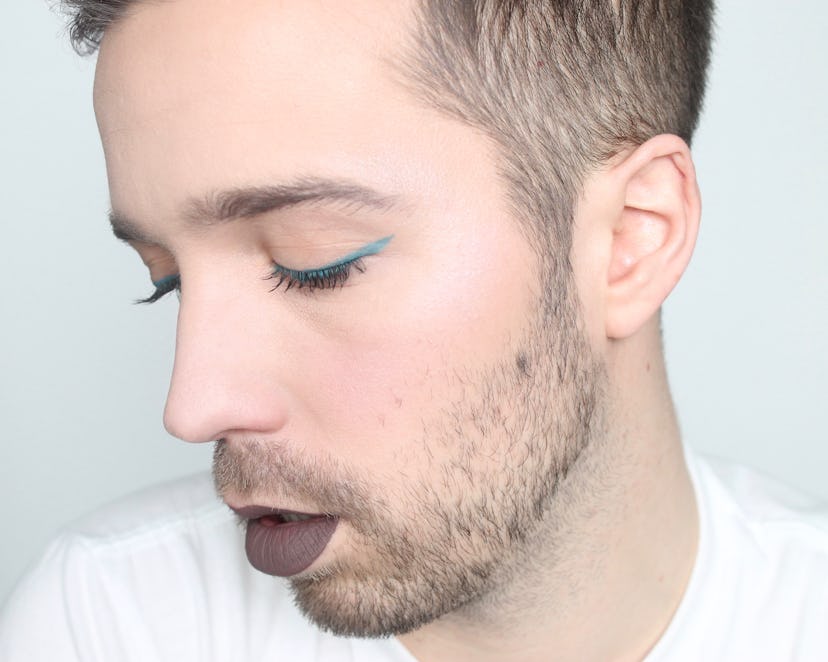
I know that looks like next to nothing, but when I pop my eyes open...

...it's all you really see. I kept my line relatively skinny but don't be afraid to go for a thicker band of liner, or just cover the whole damn lid with liner and just call it a day.
Even if you hate shadow, there are ton of eye products you can use to get a full on eye look. I waited years to start playing with my lids, don't make the same mistake I did. Get yourself some cream shadows, pencils, and liners and let yourself go wild.
