Looking for an at-home activity that you can take on, in between all those Zoom conference calls that are filling your schedule? Look no further than friendship bracelets. Not only are arm parties coming back with fervor this Spring (and friendship bracelets are a great excuse to add a bit of color to that building stack), but you could surely use a DIY project right about now, you know, besides baking banana bread.
Cotton-knotted jewelry making is meditative at its core, and there’s no better time to incorporate a little relaxation in your daily schedule than now.
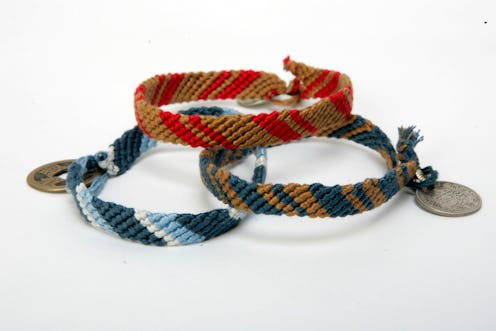
Think back to those summer camp days, sitting by the lake, embroidery floss looped around your big toe. You picked out the perfect array of colors, trying your hand at a chevron pattern for the first time, and thinking about making matching bracelets for all your besties. Well, that day is back. It’s time to jump back on the friendship bracelet bandwagon. You will not regret it. But the question is…how? Read on for everything you could possibly want to know about making friendship bracelets.
What do I need to make a friendship bracelet?
Very little!
•Embroidery floss of any selection of colors
•Tape
How To Make Friendship Bracelets Easy
OK, so you're all set up and it's time to weave.
1. Begin with a selection of embroidery floss colors at your choosing. Cut each strand equally, at about 24-inches long.
2. Fold the entire selection in half. Leaving about an inch or so at the fold
3. Knot the grouping together and fan out the strands, separating the two sets and arranging the colors in the same duplicate order, left-to-right. For example, if you are working with red, yellow, green, and blue, your strands would organize in the following way: red, yellow, green, blue, red, yellow, green blue.
How To Make Friendship Bracelets With Thread
1. Beginning from left to right, pull the first two strands away from the pack.
2. Create a figure-4 by crossing the first strand over the taught left strand.
3, Loop that same strand through the opening that you have created and, continuing to pull the second strand tight, crawl the knot up, towards the top until it’s tightly secured in place. Repeat a second time.
4. Move on with that same knotting strand onto the third, fourth, and so on. Eventually that original first strand should wind up as the last in the grouping, all the way on the right.
5. Congratulations! You have now completed your first line. Repeat that from left to right with all of your colors, until you have created a chevron whose length is to your liking.
How To Make Chevron Friendship Bracelets
Of course, there is an unlimited amount of patterns and shapes that you can create after you have mastered the basic diagonal stitch, but the most commonly used is the chevron. If you feel as though you’ve got the above down pat, follow the below variation to craft a perfect chevron.
1. When you separate out your colors after knotting the top of your folded strands, arrange the lines in a mirrored image. For example, if you are working with red, yellow, green, and blue, your strands would organize in the following way: red, yellow, green, blue, blue, green, yellow, red.
2. Create that figure-four knotting pattern from left to right, stopping in the middle, right before your mirror image break.
2. Moving from right to left, do the same, though the figure-four will be facing the opposite direction.
3. When the two “first” strands meet in the middle, knot them together twice.
4. Repeat.
Enjoy your new meditative, nostalgic, quarantine-approved DIY project and share your completed bracelets with all your long-lost friends.
