Life
How to Make Cookies That Are Also Holiday Cards
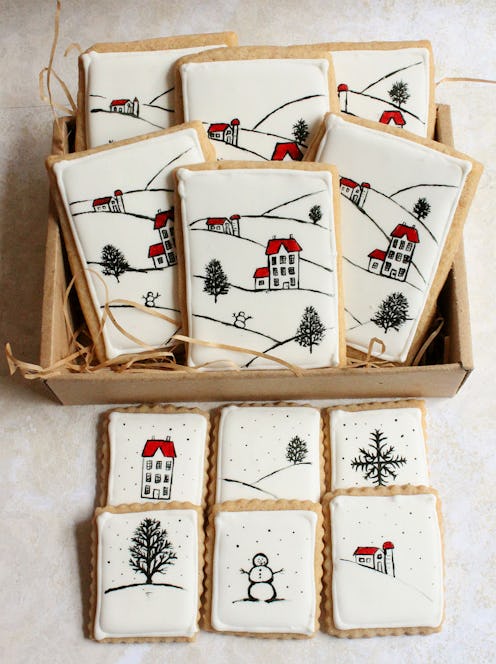
There are so many things I love about Christmas that it would be hard to pick a favorite… There’s decorating the tree, Christmas baking, wrapping gifts, Christmas music… Although I can’t pick just one favorite, I can definitely say picking out, sending, and receiving Christmas cards is easily in my top three. Picking out my cards is among the first things I do for Christmas, so for me it always feels like the real start of the Christmas season. And I love all the wonderful designs! I can spend way too much time browsing cards in the store or online! Which is why I couldn’t help but replicate this beautiful handmade card by Paper, Scissors, Superheroes. Because really, what could be sweeter than a Christmas card inspired cookie?
Christmas Card Cookies
Yields 12 cookies (6 small, 6 large)
INGREDIENTS:
12 cookies, preferably 6 small and 6 largeOne batch of white royal icing in piping and flooding consistenciesBlack and red food gel colorA toothpick or wooden skewerA small, clean brush
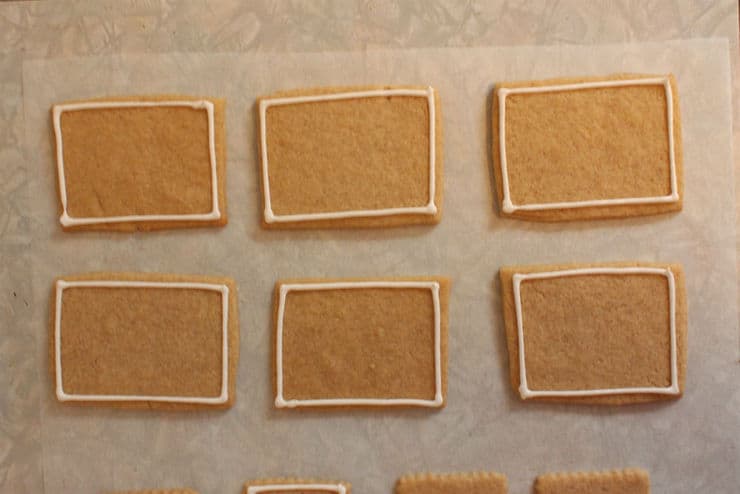
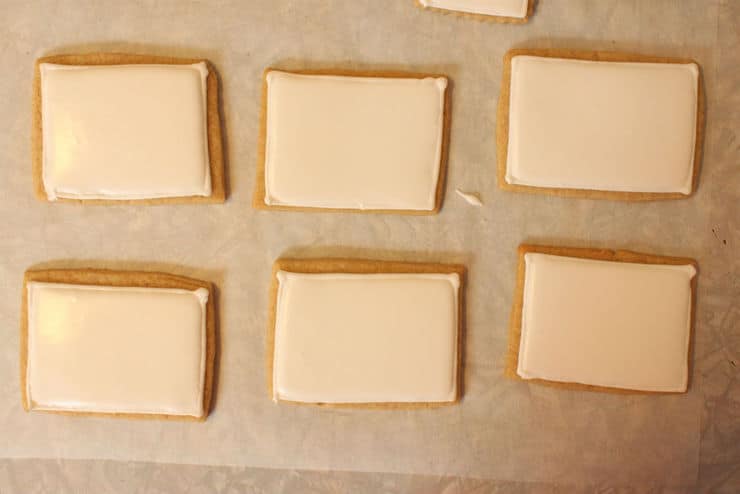
Start by making your cookies, preferably a day in advance so they have enough time to cool and leech out any grease that they can. You can use just about any sugar/cutout recipe you’d like, but I would recommend this simple sugar cookie recipe. Once your cookies are ready, pipe a simple white royal icing outline and flood it with white royal icing. Let the icing dry overnight to make sure the wetness from the food coloring doesn’t cause any discoloring or scratches from the wooden skewer/toothpick.
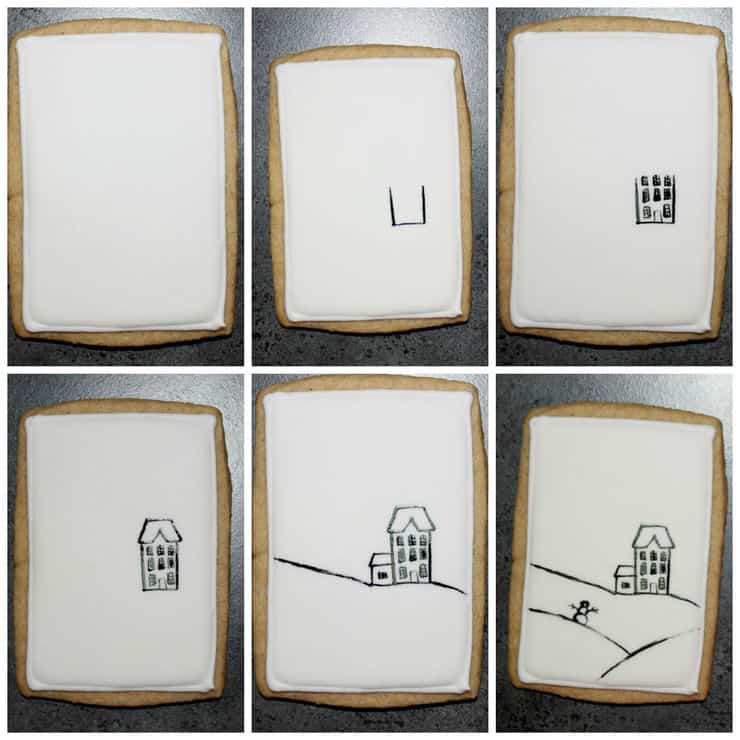
Once the royal icing is sufficiently dry, you can start drawing your design! You can use a small brush to apply the design, but I used a wooden skewer because I felt like the rigidness gave me more control. Keep in mind, if you use the wooden skewer/toothpick, you’ll have to re-ink it often to make sure your design turns out nice and dark. Ultimately, you should use whatever you’re most comfortable with and what works best for you.
I started with the house to give me a point of reference for the rest of the design. From there, I created the hills and snowman below the house before moving onto the hills and barn above the house. I ended with the trees, which I drew by creating a vertical line, then drawing the main branches coming off it, and finally filling it in with small branches. Once the black food coloring was mostly dry, I painted the roofs red with a small brush.
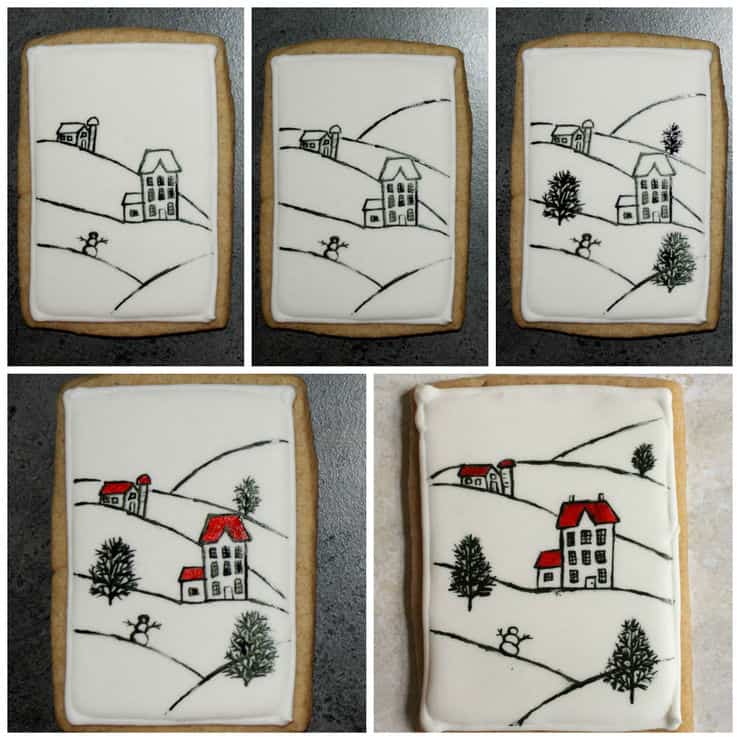
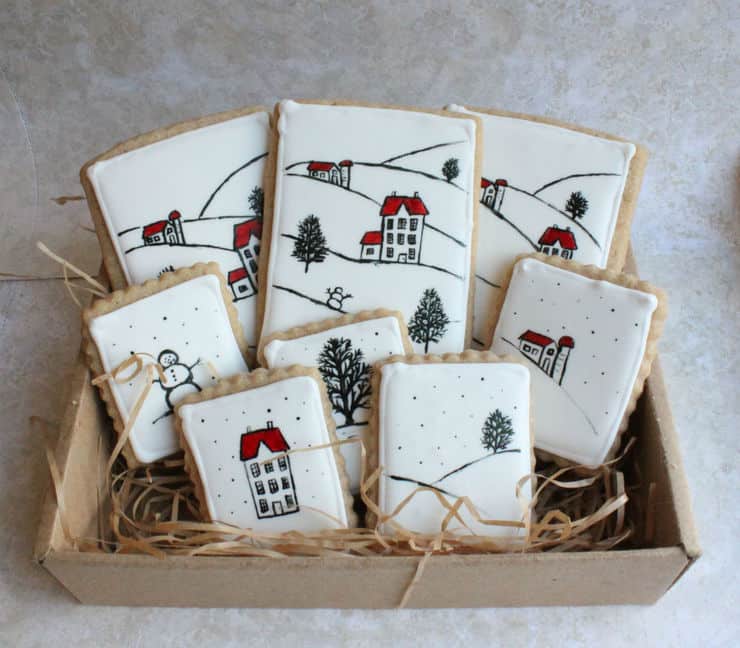
For the smaller designs, I just kind of ad-libbed images I liked from the larger design. Let the food coloring dry completely before packaging. If the food coloring remains sticky, lightly brush the design with powdered sugar.

Happy baking!
This post originally appeared on The Simple, Sweet Life.
