Life
Here's How To Create Your Own Snapchat Filter

Are you sitting down? I hope you're sitting down, because you're about to get the shock of your life. Well, shock of the week. Day, maybe? Regardless, prepare to be shocked, because I have Big Freaking News: You can create your own Snapchat geofilters.
Of course, depending on your level of Snapchat obsession, this might not actually be news to you — geofilters have been around since the and of 2014, and the company has always accepted geofilter designs from the community. (Getting them approved is another matter entirely, but we'll get to that later.) For those who are new to the app or haven't quite figured out all its bells and whistles yet, geofilters are overlays that correspond to locations or events; the San Francisco Golden Gate bridge geofilter, for instance, features a design incorporating the shape of the bridge.
It's pretty amazing technology, but geofilters are sometimes overlooked in favor of flashier, simpler functions like puking rainbows and face swapping. Furthermore, submitting a design for a geofilter requires you to design a graphic in the first place, which most people may not have the time or inclination to do. But if you want to see one of your own designs show up on your local Snapchat story, it's absolutely an option, and as always, it's simpler than you'd think. Here's how to do it:
1. Choose Your Location
The first order of business is to choose the location for your geofilter; after all, this should inform your design. According to Snapchat's submission guidelines, it's important to choose wisely: The website suggests a "public place, neighborhood, landmark, venue or other location where people are likely to gather and send Snaps." Businesses don't count, by the way.
2. Design Your Graphic
It's fairly intuitive, but in order to submit a proposed geofilter, you have to create a design in the first place. As the least visually creative person in the universe, I can't really help you beyond that point, but I'll trust in your artistry. You can check out Snapchat's detailed guidelines here.
3. Draw The Geofence
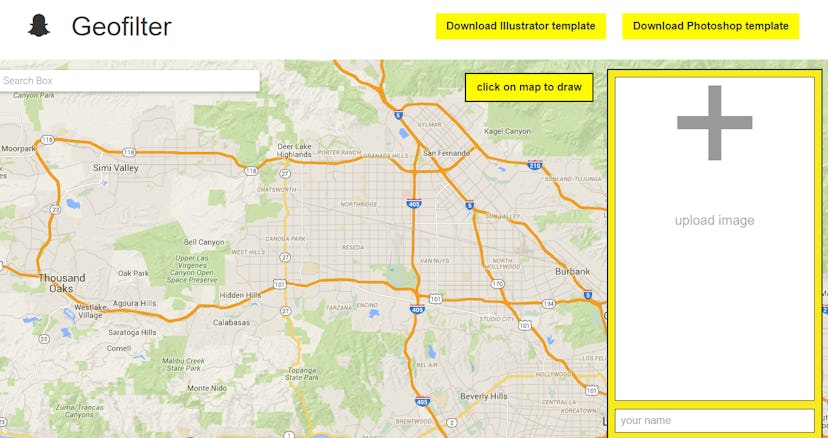
Once you've picked the area and designed your filter, head over to the geofilter submission section of Snapchat's website to begin the process. It should take you to a screen like the one pictured above. Click on the map to outline the geofence marking the area in which the filter would be available.
4. Upload Your Design

Upload your design as a .PNG by clicking on the giant plus sign on the right side of the page. According to Snapchat's tips for geofilter submission, there are a few rules about the file: Make sure it's web-optimized and transparent, 1080 pixels by 1920 pixels, and under 300 KB.
Finally, fill out the form underneath the uploaded image; it asks for information like your name, why the location is meaningful to you, and so on. There's also a notes section for additional information — if your design corresponds to an event, for instance, you'll want to include the date(s) and time. Hit submit, and you're done!
Of course, Snapchat doesn't accept every submission, but if you keep their guidelines in mind, your design might just end up featured on everyone's Story. Technically you can't win anything with the app, but I'd say that's pretty close to a Snapchat victory.
Images: Snapchat (2)
