Fashion
Applying Liquid Lipstick For The Most Precise Pout

Liquid lippies have been trending for the past couple of years and with dozens of beauty bloggers flooding our feeds with luscious pouts of crispy line perfection, they definitely won't be going away anytime soon. Trying to get your liquid lipstick precise in real life can go oh so wrong, so fast, even if the pros make it look super easy in their 15 second Insta videos.
No matter how many times you've been defeated when applying your liquid lipstick, these babies still maintain their allure. Their unique liquid to matte formulation make them makeup bag staples with their ultra pigmentation and transfer proof qualities. But sometimes they're such a pain to apply. You can watch beauty gurus sweep liquid mattes across their lips so effortlessly a million times without a single line out of place, and still manage to smudge or feather your lipstick when applying your own makeup.
However, I assure you that professionals aren't the only ones who can have the cleanest lipstick lines around. With the right prep and application techniques, mere makeup mortals can have Instagram worthy lips, too. If you've been lipstick challenged lately, here's how to apply your liquid mattes like a boss and really do them justice.
1. Exfoliate

One of the most underestimated, but crucial steps to achieving flawless liquid lipstick looks is to exfoliate your lips. Using a lip scrub will remove any dead, flaky skin before lipstick application. My personal favorite exfoliant is Fresh's Sugar Lip Polish, a formula that uses brown sugar crystals and a blend of oils to even out texture and hydrate the lips.

Fresh Sugar Lip Polish, $24, Sephora
2. Moisturize
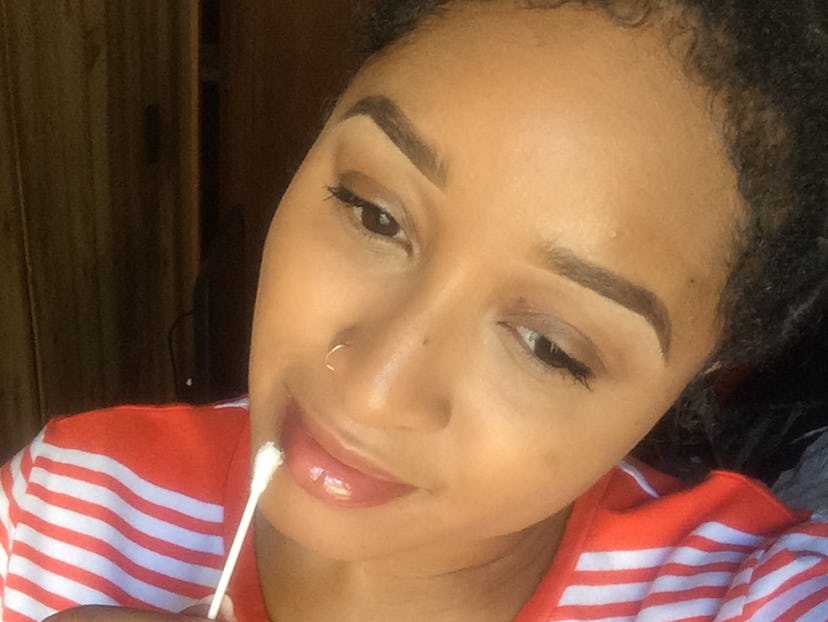
Nutiva Organic Coconut Oil, $8, Amazon
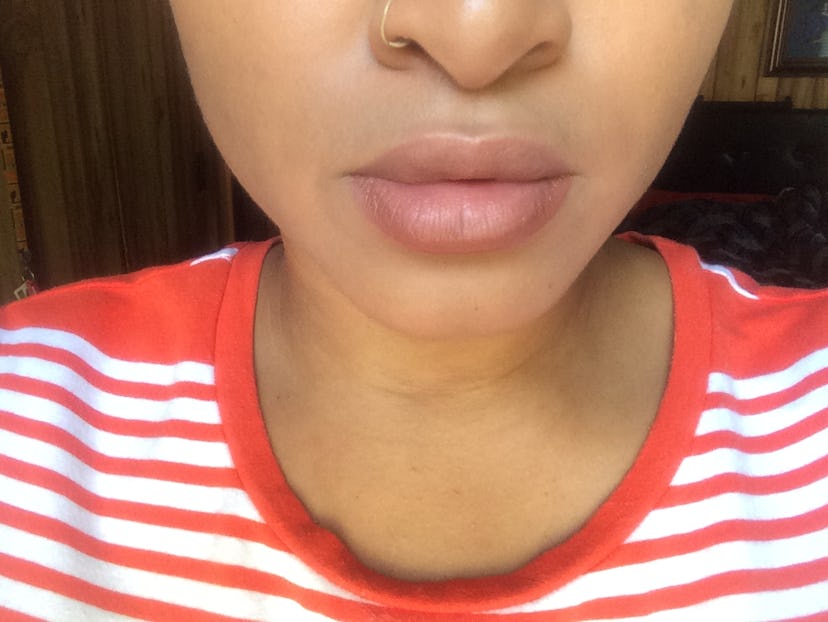
After exfoliating, restoring moisture to your lips will bring them back to life. You want the smoothest canvas possible before applying your lipstick, so using a lip balm or chapstick to nourish them is key. I normally opt for coconut oil when I'm in a pinch, which I apply using a Q-tip.
Once the exfoliating and hydrating steps are complete, I continue with the rest of my makeup routine. This will give your balm time to settle onto your lips before going in with a lipstick.
3. Prime

Next, use a lip primer to make your pout even smoother. Lip primers like my go-to product, Anastasia Beverly Hills' matte primer, fills in the thin lines in your lips to reduce feathering and flaking. A good primer will not only give your lipstick a better appearance, but also helps your color lasts longer.

Anastasia Beverly Hills Lip Primer, $16, Ulta
4. Pat On Foundation
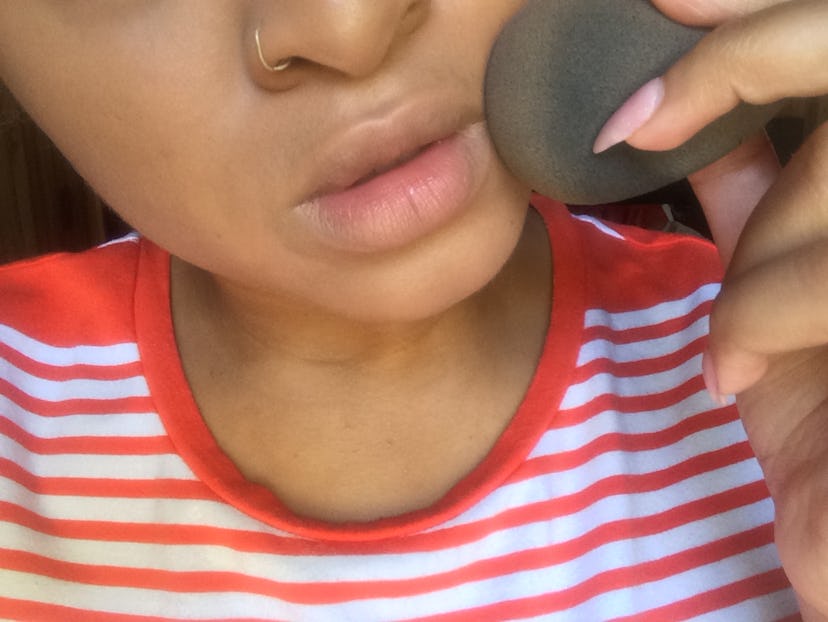
Maybelline NY Fit Me Foundation, $6, Amazon
Using a little foundation left over from your brush or beauty sponge, pat a little foundation over the corners of your mouth. You don't want to completely saturate your lips, but using your foundation as a base gives your lipstick something to adhere to. It also protects against feathering around the outer edges.
5. Line Your Lips
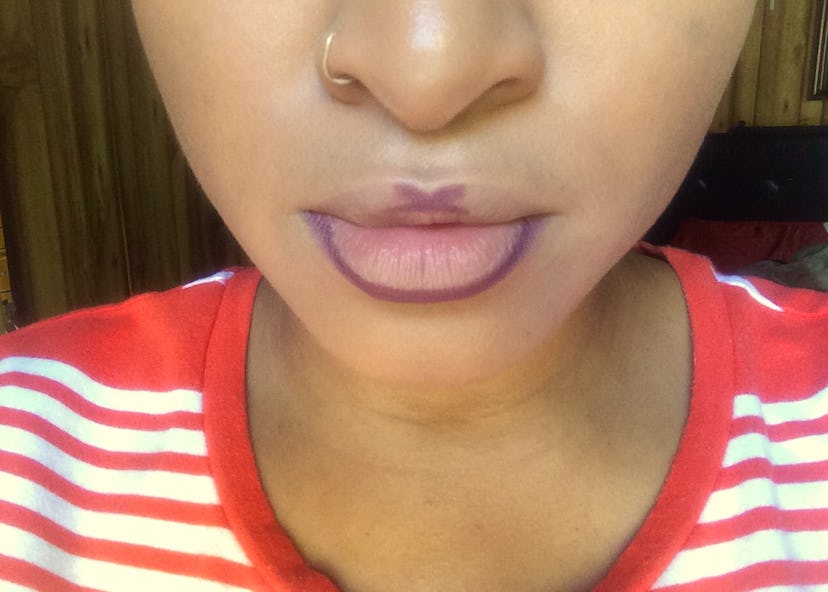
With a steady sweep, line your bottom lip. Starting with the bottom first helps ensure you don't go overboard by over lining your upper lip.
One of the best techniques for lining your top lip is to start with the cupid's bow by creating a tiny "X" that aligns with the dip.
Continue the process by lining the outer edges of your top lip. Feel free to add more shading in the outer corners. This extra color will help keep your liquid lipstick inside of the lines, and creates an ombré effect when you use a liner a shade or two darker than your lippie.
6. Use Anti-Feather Liner

If lining your lips with color doesn't feel right, there's another alternative: A clear, anti-feather lip pencil.
I turn to the Obsessive Compulsive Cosmetics clear, anti-feather pencil to give my liquid lipstick a buffer. Because the liner is clear, it's totally okay to draw a little outside of your mouth. There's no way your liquid lippie will spread now.

OCC Anti-Feathered Clear Primer Pencil, $16, OCC Makeup
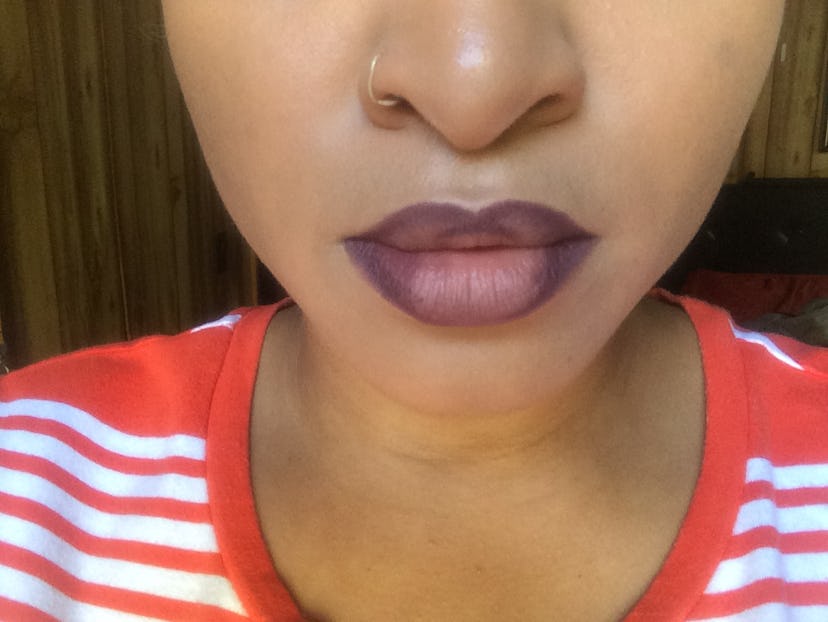
7. Apply Your Lipstick

Now, it's time to make the magic happen. Using the same technique employed when lining, start with your bottom lip. With a lip liner already in place, you don't have to take your liquid lippie too close to the outer edges.
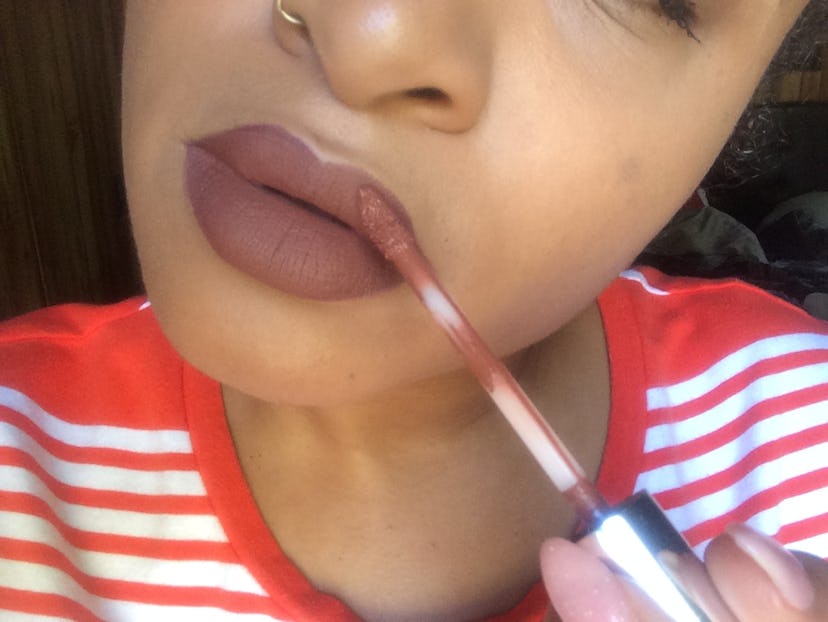
Complete the look by filling in your upper lip, starting with the cupid's bow and continuing into the outer corners.
The same method applies, even if you opt for a clear liner over a colored one. Experience has shown me that it's always best to start with the bottom using a long, clean sweep.

Using shorter strokes to color in the rest of your upper lip works best since working around the cupid's bow can be tricky.

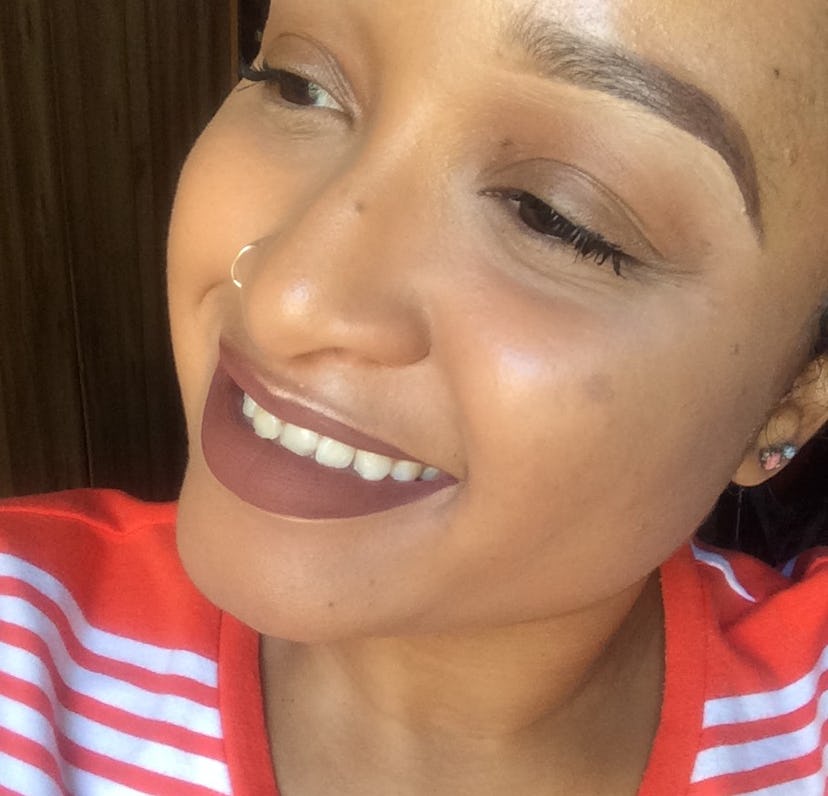
Proof that clean lines from someone who isn't a professional does exist.
8. Conceal Edges
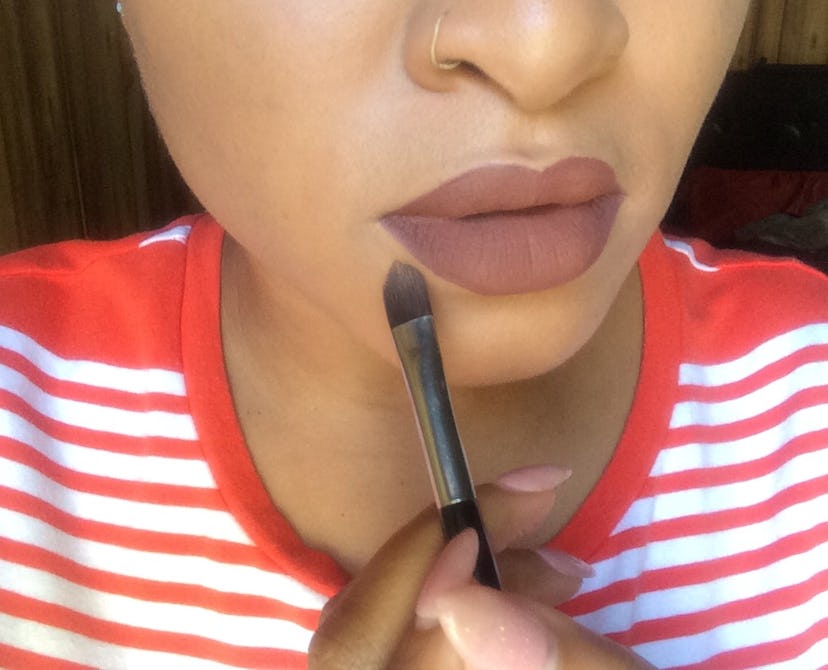
Slip-ups are inevitable sometimes. If all else fails you can always use a tap of liquid foundation or concealer to touch up the edges of your mouth without having to completely re-do your lipstick. Just be sure to use a flat concealer brush that can make clean strokes.
You don't have to be a makeup maven to master sharp liquid lipstick. All it takes is a little patience and the right prep to send you on your way to the ultimate matte lipstick paradise.
Images: Summer Arlexis
