Fashion
Makeup Tutorial to Hide Puffy Eyes & A Runny Nose
Tis' the season to be snotty, tra la la la la! This time of year can be the most fun — there are holidays to celebrate; gifts to exchange; chocolates to eat (or drink... with booze); parties to attend. But sadly, it can also be plagued with snot and mucus: an inevitability few of us are fortunate enough to escape. This year I am one of the unfortunates. I have spent the last week surrounded by tissues, wrapped in blankets, and consuming copious amounts of hot tea, chicken soup and orange juice. My skin is dry, yet breaking out due to my immune system imploding; my eyes are puffy; my nose is redder than Rudolph's. To many, it would seem I've reached a level of flu-y-ness incapable of being remedied. But as with most things in life, there exist makeup tricks to help you look good, even when you feel like crap.
It seems like just about everybody I know has a cold right now, and we are all feeling equally awful. It is a sad fact of life that winter brings these nasty germs that need warmth to survive, but for some bizarre reason seem to thrive in the cold weather. Life is not fair.
Unfortunately for me, having a cold is not considered a serious enough condition to excuse me from the numerous family visits, parties and other events I am expected to attend this holiday season. Even more unfortunately, I currently have a face that could turn people to stone if they look directly at me. This calls for drastic measures: the kind only my makeup bag can provide.
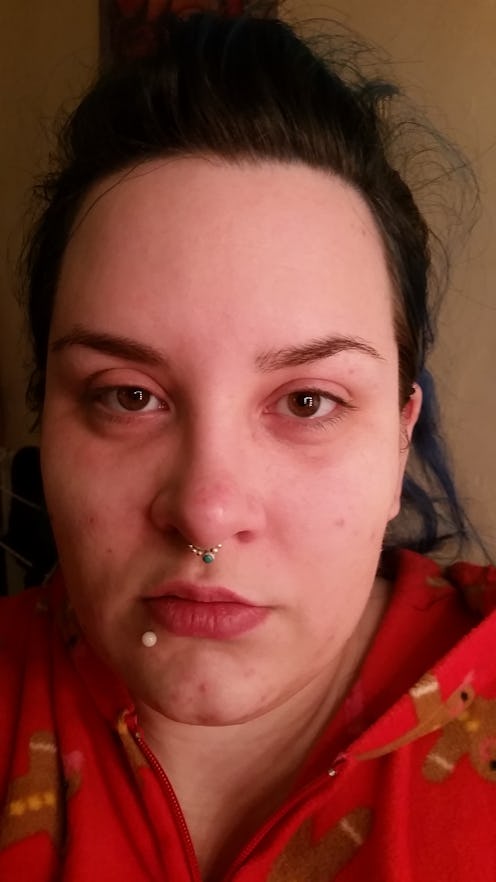
Brace yourselves, dear readers, for today, I look like this:

It's distressing, I know. I did warn you. But fear not, my brave companions and fellow cold-sufferers: all is not lost. For we can rely on that wondrous phenomenon we all know as makeup (though I believe it should be called magic).
In the following steps, I will explain how I brought my visage back to health, even if I could not do the same for the rest of me.
STEP 1: FOUNDATION

Straight away, skintone is somewhat evened, though my eyes still appear red and puffy, and many of the blemishes from my breakout are still visible. I used L'Oreal True Match.
STEP 2: CONCEALER

I apply concealer under my eyes, over my nose (concentrating on the edges of my nostrils as well as underneath them, where I am red from all the nose-blowing), plus over my blemishes and inside the arches of my eyebrows. I used L'Oreal True Match Concealer.
STEP 3: BLEND

I use my fingers to blend my concealer, but of course you could also use a blending brush. I make sure to blend the concealer as close to the waterline in my eyes as I possibly can.
STEP 4: APPLY BLUSH AND TIGHT-LINE THE EYES

Now I need to add some color back to my cheeks with a little blush, and try to hide the redness of my water and eyelash lines. I do this by applying white eyeliner to the inner quarter of my waterline, and black eyeliner to the outer three quarters of both the waterline and lashline. I use kohl pencils from Barry M and a blusher from Kryolan.
STEP 5: EYESHADOW AND LIQUID LINE

For a really dramatic look, I would apply a smokey eye here; but since I am not feeling very well, just a single shade of eyeshadow — blended out towards my browbones — will do for today. I also add a thick line of liquid eyeliner. You could also use gel liner or a dark eyeshadow stippled on with an angled brush, depending on your preference. My eyeshadow is from E.L.F. and the eyeliner is Rimmel London.
STEP 6: BROWS AND LASHES

The final touches are a couple of coats of mascara and a quick fill in of my eyebrows. For this stage, I use Hypnose by Lancome for my lashes and an eyebrow kit from E.L.F.
STEP 6: HAIR

All that's left to do is tidy up my hair (I just slicked mine back into a ponytail with a small pompadour). And then it's time to get dressed (because sadly, a gingerbread onesie is just not deemed socially acceptable in most places).
Images: Sarah Martindale
