Fashion
How To Create The Perfect Rainbow Eye Look

Love is always louder. On June 26, the Supreme Court voted to legalize gay marriage throughout the United States, and I couldn't be more excited. In order to show off my support, I decided to create a fierce rainbow eye makeup look to celebrate the historic event. Rainbow makeup looks have taken over Instagram this past month, and I decided it was my turn to try out the trend. Surprisingly, creating this colorful look was way easier than I thought it would be!
The most important part of creating the perfect rainbow eye look is having the perfect primer. Try using eye primers that promise long-lasting wear while adding slight color to even out your lids. It's important with this look to have a solid base that all the eyeshadows can cling too. Having a good primer on the lids will allow your eyeshadows to pop and be more vibrant. Another thing to keep in mind when creating this look is that you want each color to stand out. Avoid blending the colors too much, or you might end up looking like a colorful mess. With the end of Gay Pride month, and this historic moment in our nation, this is the perfect time to show off your support of the LGBTQ community. Whip out those colorful eyeshadows, and start celebrating!
1. Primer

After searching through dozens of primers, I decided to go with a shimmery white cream eyeshadow. Not only would the white brighten the colorful eyeshadows, but it would create a base for the shadows to stick to. I used the white cream highlighter from the NYC Individual Eyes Palette in Union Square.
2. Red Shadow

I've never really played around with red eyeshadows before, but I'm officially in love. I played Ioni Cosmetics Blush in Orgasm on my inner lid and tear duct area to begin my rainbow look.
3. Orange and Yellow

I continued the look by adding orange and yellow shades from the Wet N Wild Art in the Streets Palette to my upper lid. I placed the orange shade in the middle, and kept the yellow shadow on the outer third. I took a fluffy eyeshadow brush, and gently blended the lines between the colors to avoid a stark look.
4. Lower Lid
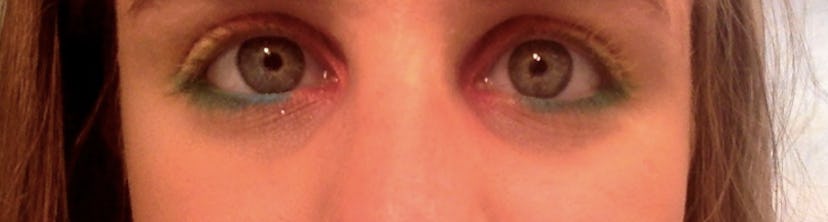
Next, I added the blue and green shades from the Wet N Wild palette to my bottom lash line. I kept the green towards the outer corner, and placed the blue shade in the middle of the lash line.
5. Purple

Moving on to the purple shade in the Wet N Wild palette, I placed the color both in my crease as well as my inner lash line. The color was very subtle, so it was perfect for blending the rest of the eyeshadows.
6. Eyeliner
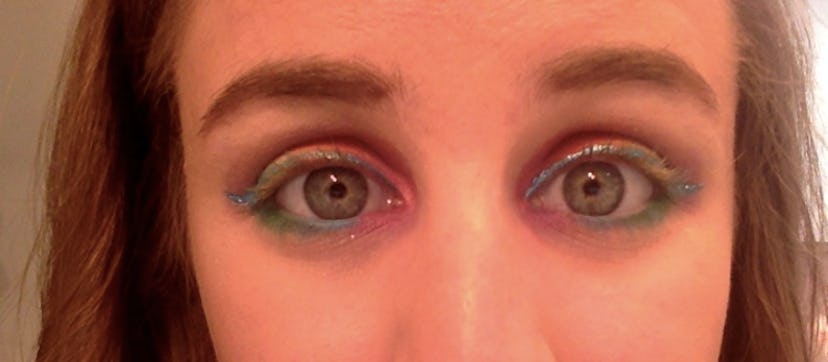
Skip boring black eyeliner for this look! I went for a bright blue glitter cat eye to pump up my eye look. This eyeliner by Nicka K Cosmetics is super fierce. This is totally going to become a staple in my summer makeup routine.
7. Mascara

I recommend applying mascara to only your top lashes. This way the focus is more on your eyeshadow than on your mascara.
8. The Finished Look

Did I mention that I was in love with this look?
Images: Emily McClure (8)
