Life
The Loveliest DIY Project You Haven’t Tried
Oh, vintage plate. How do we love thee? Let us count the ways… This vintage plate DIY idea is one of those projects that makes me so happy, because really, who doesn’t love the feminine frilliness, vivid color, and handed-down authenticity of vintage tableware? Vintage cups, saucers, plates, and bowls elevate an otherwise ordinary brunch or tea-sipping session to epic proportions. Plus, older tableware is so pretty as standalone objects — regardless of whether food and beverages are part and parcel.
When designing your own, unique space, vintage tableware — and vintage decor, too — helps you craft a layered, storied style. It's as if you have amassed a nice, thoughtful collection of pieces over time — objects with stories and provenance — as opposed to furnishing rooms with cookie-cutter items you see in every big-box store. Trust us, visitors to your home will know you hastily nabbed that all-white dish set, floor lamp, and polypropylene picture of the Flatiron Building during one crazed afternoon of shopping.
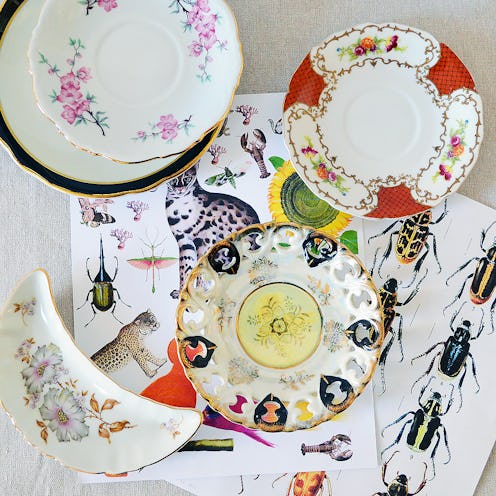
Think it’s impossible to make vintage vessels even lovelier? Au contraire! Create the ultimate catchall — a place for keys, change, paperclips, jewelry, and more — by decorating vintage bowls, plates, and saucers with fresh, modern decals inspired by the natural world.
Step One: Get yourself some water slide decals.

Folks into model-making use these all the time to make their own homemade decals for their plastic and metal planes, trains, and cars. Ordering online is the best way. Staples doesn’t have them. Art stores aren’t likely to, either. Check out Amazon for a pretty good, affordable selection. Sheets usually come 10 per pack.
Step Two: Choose your subject matter.

If you don’t have a highly illustrated book you love on hand, conduct a simple Google search for illustrations or photographs of mammals, birds, reptiles, insects, and really anything else that tickles your fancy.
Step Three: Scan your images.
Once scanned, they may need to be resized and/or repositioned so that they fit onto an 8.5-inch x 11-inch decal sheet. TIP: Play around with editing software like Gimp (free) or Photoshop (not free by a mile).
Step Four: Print those bad boys.

Test print on a regular sheet of paper before printing onto the decal. TRICK: To ensure images print on the right side of the decal, write “back” and “front” on the printer paper before printing — to figure out the correct way to feed decals into the printer.


Oh, hi. Here are the finished products. Cool, right?

Interested in the full tutorial experience?
Get crazy-good imagery you don’t have to find yourself, learn which types of decals work best, and how to make them really stick.
You & Yours Fine Vintage in Brooklyn is hosting a cool workshop where you can drink beer and eat pizza while coming away with two personalized vintage catchalls to gift (or keep for yourself) this holiday season.
Join us on Thursday, December 3 for a super-fun two-hour sesh!
