Fitness
How To Do A Rocking Plank In Perfect Form
Your guide to the ab-strengthening exercise.
Right when you thought planks couldn’t possibly get any harder, you find out that rocking planks exist. Not only does this move require you to hold a plank — as per usual with plank variations — but it also adds a little movement into the mix. However tough it might be, the exercise is still worth a try since it comes with extra benefits than your run-if-the-mill plank.
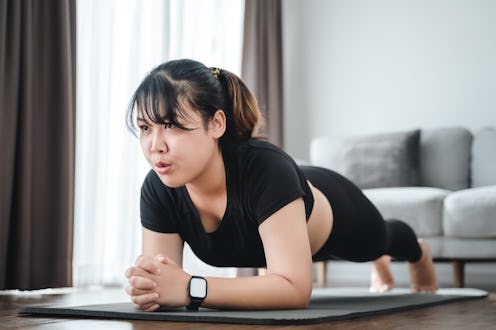
To put it plainly, a rocking plank is a plank that involves a rocking motion. “With a rocking plank, the body moves like a saw in a perfect vertical stroke movement,” says Rosalind Frydberg, a Life Time ARORA trainer. (Hence why it’s sometimes called a “saw” plank.) The exercise is typically done in a low plank position, she tells Bustle, as you slowly glide a few inches forward and back while balancing on your forearms and toes.
While rocking planks work all core muscles you might expect from doing regular planks, they also call on other muscle groups. According to Frydberg, you’ll use your shoulder muscles for stability as you tip forward, your chest muscles to hold yourself steady, the inner thighs as you hold the plank, and your calves as you perform the subtle movement.
As Frydberg explains, the exercise is a great total bodyweight strengthening movement. “You are trying to keep your hips and core stable as you perform the tiny rocking movement, which also increases your stamina,” she tells Bustle. And your feet get a mini workout, too. “Foot, toe, and ankle mobility come into play anytime we get to move our tiny muscles in our toes,” Frydberg adds. “So that’s a bonus.” Here’s how to do the rocking plank properly in case you want to add it to your ab routine.
How To Do A Rocking Plank
To make the most of this move, you’ll want to go slow and focus on maintaining good form the entire time. Here, Frydberg shares how to do a rocking plank step-by-step.
- Start by standing on your mat.
- Hinge forward at the hips and walk your hands out into a plank.
- Lower down onto your elbows.
- Stack your shoulders so they’re above your elbows. Keep your shoulders relaxed.
- Place your palms flat down on the mat.
- Engage your core to maintain a straight line through your body.
- Once situated, use your toes to push off the floor to “rock” your body slightly forward.
- Slowly glide forward an inch or two.
- When your abs engage, return to the starting position.
- Keep rocking in a slow, controlled motion, forward and back.
- Do 10 reps.
- Pause, then do 10 more.
- Work your way up 5 sets of 10 reps.
How To Modify The Rocking Plank

To make a rocking plank easier, simply lower your rep count, drop your thighs or knees to the mat to take pressure off your core, and/or cross your arms in front of you to take pressure off your wrists, Frydberg says.
To make it harder, Frydberg recommends squeezing a Pilates ball between your thighs or placing a sandbag across your shoulders for a little extra resistance. You can also do all this from a high plank position to up the challenge.
Common Mistakes To Avoid
However tempting it may be, try not to rock forward from your shoulders or hips, Frydberg warns. Always move from your toes to ensure you engage your abs. It’s also important to maintain a straight line through your body as you rock to make the most of the move and avoid strains in your neck or back.
If you get tired or your stomach starts to sink to the ground, that’s your cue to take a break. It’s much better to rest, reset, and get back into it with good form than to push through in an improper alignment. To take a break, Frydberg recommends flipping onto your back and drawing your knees to your chest for a nice posterior stretch before you get back to rockin’.
Sources:
Rosalind Frydberg, Life Time ARORA trainer
This article was originally published on
